A brand launches a new product into 500 Walmart stores. The display arrives on time. Store associates assemble it, stock it, and walk away. Two weeks later, the bottom shelf is touching the floor. Product is removed. The category manager gets an email from the store manager. The brand writes off 12,000 units. The display supplier says, "You didn't tell us the product weighed that much."
This is not hypothetical. This happens every year. And it is almost never the factory's fault — it is a failure of information, not a failure of cardboard.
What follows are six real display failures. Each follows the same pattern: something was assumed, something was not asked, and something collapsed. If you are a brand manager, trade marketer, or procurement professional sourcing cardboard displays, these six case studies will save you from repeating the same mistakes.
CASE 1: The Shelf That Could Not Hold
Display type: Floor Display, 3 shelves
Product: 12-oz glass bottles in 4-packs
Retailer: Mass merchandise (unnamed)
Risk level: ★★★★☆
What happened
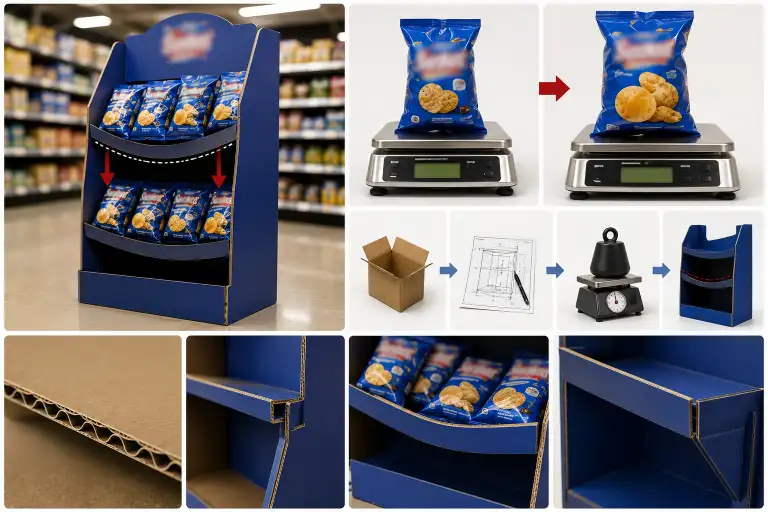
The display was designed for a different product line — 8-oz single bottles in a lightweight carton. The brand swapped in a heavier product without updating the structural spec. The factory built to the original drawing. The middle shelf sagged 2 inches within the first week. Store staff unstocked the display and put the product on regular shelving. The display was discarded.
Customer feedback
"Shelf is bending. Store rejected the display."
Surface cause
The factory used B-flute single-wall for all three shelves.
Real cause
The brand did not communicate the product weight change. The factory built to the specification on file. The spec said "8 oz bottle" but the actual product was "12 oz bottle in 4-pack" — a 6× weight increase per shelf.
Solution
- Every shelf must be designed for the heaviest product that could go on it, not the current product
- When changing product SKUs mid-project, send the new product to the factory for a fit-and-weight check
- Reinforce shelves with double-wall board (BC-flute or EB-flute) for any shelf load above 8 kg
Lesson for buyers
Product weight changes mid-project are the #1 cause of shelf failure. If your product changes at any point — even a minor packaging change — tell your supplier immediately. A single email can save tens of thousands in write-offs.
CASE 2: The Pallet Display That Buckled in Transit
Display type: Full Pallet Display, 48" × 40" GMA pallet
Product: 5-lb bags of pet treats (20 bags per display)
Retailer: Warehouse club
Risk level: ★★★★★
What happened
The display was designed for floor-ready placement at a warehouse club. 30 units were shipped pre-assembled on pallets. When the shipment arrived at the distribution center, 22 of 30 displays had crushed bottom panels and split corners. The retailer rejected the entire shipment. The brand paid for destroy-and-replace plus an emergency air-freight order.
Customer feedback
"Units arrived crushed. Cannot put on floor."
Surface cause
Board grade too low for the weight.
Real cause
The display weighed 120 lb empty and 220 lb when loaded. The total pallet height was 68 inches (display + pallet). The factory used 200 lb test single-wall board for the display base panels. During truck transport, the bottom displays in each stack bore the weight of 3 displays above them — approximately 660 lb of compression force. The 200 lb test board failed under vibration loading.
Solution
- Base panels must use double-wall BC-flute (275 lb test minimum) for any pallet display exceeding 72 inches total height
- Full pallet displays must be tested to ISTA 3A transport vibration standards before mass production
- Add corner posts or interior dividers to support vertical compression loads during stacking
Lesson for buyers
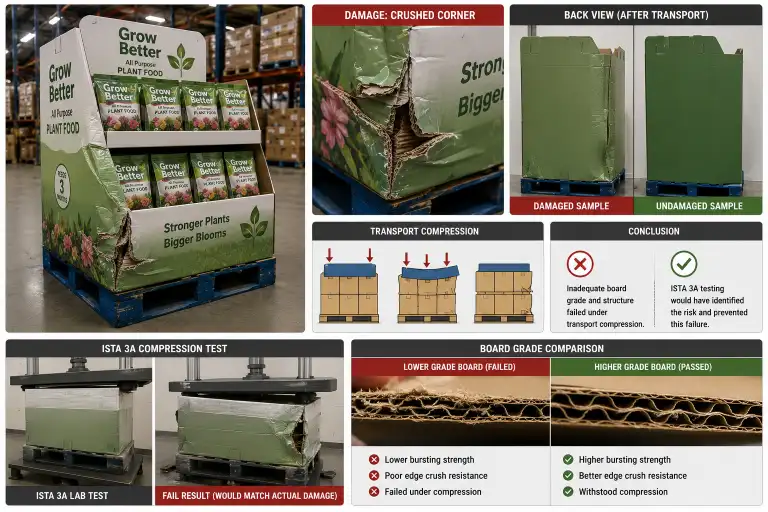
Transport compression is not the same as shelf load. A display that passes the static weight test can still collapse in transit. Any pallet display destined for a warehouse club should be ISTA 3A tested before you approve mass production. Ask your supplier for test results before you accept the quote. If they cannot provide them, red flag.
For a complete guide to structural testing standards, see [[Display Fixture Structural Design Guide|Display Fixture Structural Design Guide: Load Capacity, Stability, and Transport Testing]].
CASE 3: The Counter Display That Would Not Stay Put
Display type: Counter Display, single compartment
Product: 3.5-oz lip balm tubes (24 units)
Retailer: National pharmacy chain (CVS)
Risk level: ★★☆☆☆
What happened
A counter display was placed next to the cash register at 800 pharmacy locations. Within 3 days, store managers reported the display sliding off the counter when customers reached for product. Several displays fell and broke on the floor. The retailer removed all units from every store.
Customer feedback
"Display slides on counter. Unsafe. Please remove."
Surface cause
Display had no anti-slip base.
Real cause
The base of the display was a flat, untreated cardboard surface sitting on a polished checkout counter. The counter display was 8 inches wide but 14 inches tall — a height-to-base ratio of 1.75:1, making it inherently unstable when touched from the side. When a customer pulled a lip balm tube, the lateral force shifted the display instead of releasing the product.
Solution
- Add non-slip elastomeric pads or rubberized coating to the base of any counter display
- Keep the height-to-base ratio at or below 1.5:1 for counter displays
- Add a slight downward angle to the product opening so the display does not need to be touched to access product
- Test stability by applying a 5-lb lateral force at the top of the display — if it moves, redesign
Lesson for buyers
Counter displays seem simple, but the retail counter environment is the most unstable surface in a store. If your display goes on a checkout counter, ask the supplier for anti-slip treatment and a stability test. A display that falls off the counter damages both the product and your relationship with the retailer.
CASE 4: The Sidekick That Tipped Into an Aisle
Display type: Sidekick Display (power wing)
Product: 6-oz phone cases in hanging pegs
Retailer: Mass retailer (Target)
Risk level: ★★★☆☆
What happened
A sidekick display was mounted on an end-cap wing panel. The display held 48 phone cases across 4 peg rows. Within a week, store staff reported the display tilting forward. On day 9, the display fell into the aisle. No one was injured, but the retailer issued a compliance violation and barred the brand from using sidekick displays in any store for 6 months.
Customer feedback
"Sidekick tipped over. Compliance violation issued."
Surface cause
Insufficient attachment to the wing panel.
Real cause
The sidekick used a single hook-and-loop strap to attach to the gondola wing. The phone cases were heavy (6 oz each × 48 = 18 lb total). Customers browsing the display pulled product from the bottom rows, which caused the center of gravity to shift upward and forward. With only one attachment point at the top, the bottom of the display swung outward.
Solution
- Sidekick displays must have a minimum of 2 attachment points — one at top, one at bottom
- For products over 10 lb total load, use mechanical fasteners (zip ties or bracket clips) in addition to hook-and-loop straps
- Place heavier SKUs at the bottom rows to keep the center of gravity low
- Test with the bottom row half-empty to simulate real-world usage
Lesson for buyers
A sidekick that tips over is not just a product loss — it is a retail compliance issue that can get your entire display program suspended. When reviewing a sidekick design, ask: "Where are the attachment points? What happens when the bottom row is half empty?" If the supplier has not thought about this, find one who has.
For sidekick-specific compliance requirements, see [[Guide to Target, Walgreens, Kroger, Publix, Home Depot, Lowe's Display Compliance|Major Retailer Display Compliance Guide]].
CASE 5: The Floor Display That Collapsed Under Its Own Header
Display type: Floor Display FSDU, single-shelf with large header
Product: Premium dog food, 15-lb bags (12 bags)
Retailer: Pet specialty retailer
Risk level: ★★★☆☆
What happened
A floor display was designed with a large branded header — 48 inches wide by 24 inches tall, made from 275 lb test double-wall board with litho-laminate graphics. The header was structurally impressive. But the completed display was top-heavy. After 2 weeks on the sales floor, the display toppled forward when a customer removed a bag from the bottom shelf. The header hit a store fixture and the display was written off.
Customer feedback
"Display fell over. Header too heavy."
Surface cause
Header weight exceeded what the base could counterbalance.
Real cause
The header weighed 8.5 lb. The center of gravity of the loaded display was calculated at 32 inches from the floor — but the header alone shifted the center of gravity upward by 7 inches versus the same display without a header. The display depth was only 20 inches. When a bottom bag was removed, the remaining weight distribution could not counteract the header's leverage.
Solution
- Any graphic header weighing more than 3 lb requires a structural engineer's load calculation
- Floor displays with large headers must pass ASTM F1562 tip-over stability testing with the bottom shelf at 50% capacity
- Add weight to the base (e.g., a heavy product at the bottom, or a weighted base plate)
- The total display height including header should not exceed 3× the display depth
Lesson for buyers
Brand teams love big headers. Engineers fear them. If your marketing department wants a large header, insist on a stability test before production. Ask the supplier for the center of gravity calculation. If they cannot provide a number, they have not done the math. For a full breakdown of stability engineering principles, see [[Display Fixture Structural Design Guide|Display Fixture Structural Design Guide: Load Capacity, Stability, and Transport Testing]].
CASE 6: The PDQ That Did Not Fit the Shelf
Display type: PDQ Display (shelf-ready)
Product: 2.5-oz snack bars (24 units)
Retailer: National grocery chain
Risk level: ★★☆☆☆
What happened
A brand designed a PDQ display for a new protein bar launch. The display was pre-assembled at the factory, filled with product, and shipped flat to the retailer. When store staff attempted to place it on the designated grocery shelf, the PDQ was 0.75 inches too wide to fit the shelf. The display could not be used. Product was left in the back room until regular shelf space was freed up. The in-store promotion launched 2 weeks late.
Customer feedback
"Display does not fit the shelf. Cannot set the promotion."
Surface cause
Dimensions were wrong.
Real cause
The brand measured the shelf at a single store and assumed all stores in the chain used the same shelf width. They did not. Some stores in the chain used 22-inch-wide shelves; others used 20-inch shelves. The PDQ was designed to 21 inches. It fit the first store but not the second. The chain had a standard shelf width of 20 inches for that category — the broader stores were the exception.
Solution
- Always confirm the retailer's standard shelf width, not a single store's measurement
- If there is any variation, design to the smallest shelf size
- For PDQ displays on retail shelves, allow a 0.25-inch tolerance on each side
- Request the retailer's planogram specification in writing, not from a store visit
Lesson for buyers
One store's shelf width is not a retailer's standard. Before you finalize a PDQ design, ask the retailer's planogram team for the category's standard shelf width. Design to that dimension. Then subtract 0.5 inches. Your supplier cannot fix a width problem after the display is in production.
Failure Pattern Summary
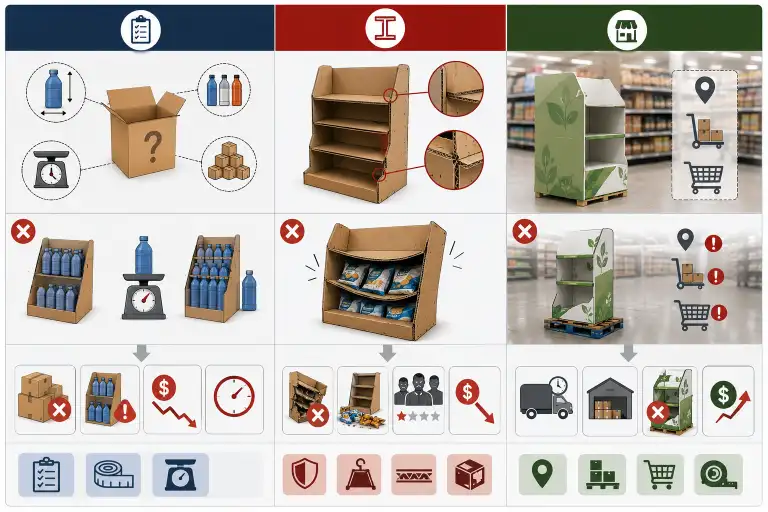
Looking across all six cases, three patterns emerge:
| Pattern | Appears In | How to Prevent |
|---|---|---|
| Incomplete product information | CASE 1, CASE 5 | Provide weight, dimensions, and packaging type in writing. Update supplier on every change. |
| Wrong structural spec for the load | CASE 2, CASE 4 | Test to industry standards (ISTA 3A, ASTM F1562). Do not assume the board grade is correct. |
| Missing retail environment data | CASE 3, CASE 6 | Confirm shelf dimensions, counter surface type, and attachment method before design begins. |
What This Means for Your Next Display Project
Every one of these failures was preventable with a simple rule: start with the product, then the retailer, then the structure. A display designed in isolation from real product weights and real retail environments is not a display — it is a guess.
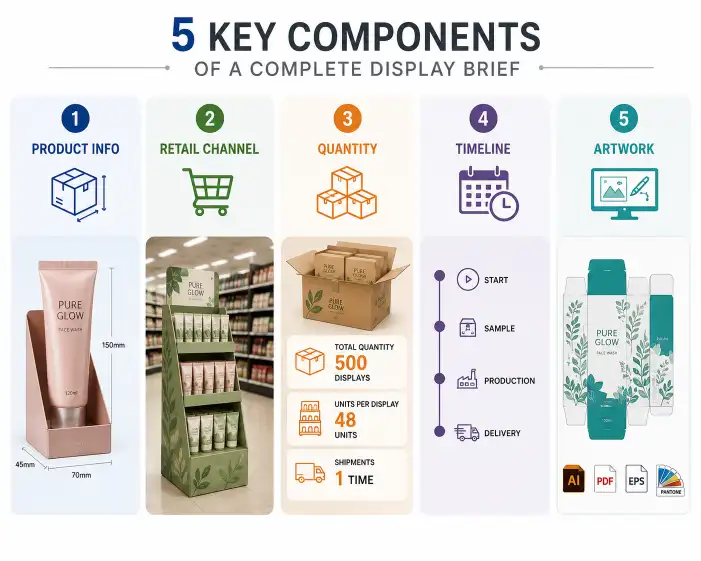
If you are sourcing a cardboard display for an upcoming retail launch, here is what to provide your supplier before they start the structural design:
- Product weight per unit and per shelf
- Product dimensions including packaging
- SKU count and quantity per display
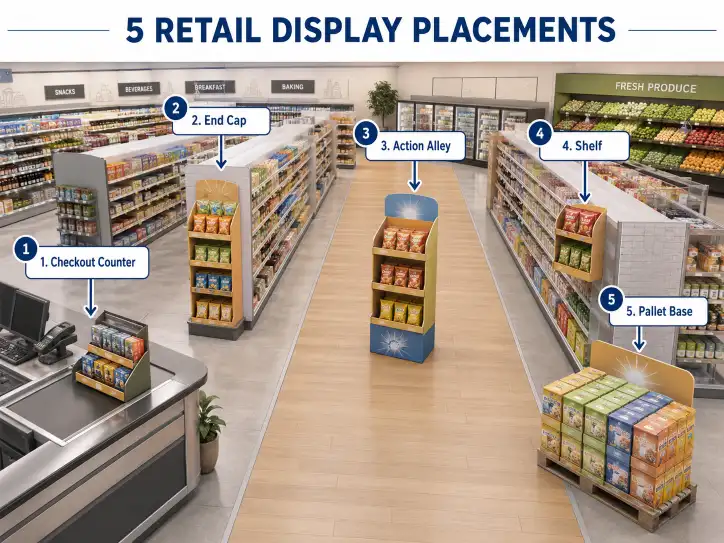
- Target retailer and specific store location (shelf, end cap, action alley, pallet base)
- Retailer-specific height and width restrictions
- Launch date and shipping method (flat pack vs pre-assembled)
- Assembly responsibility (store associate vs pre-assembled at factory)
For a structured framework to assess your project readiness, see [[Cardboard Display Selection Guide - Decision Framework for Buyers|Cardboard Display Selection Guide: A Decision Framework for Buyers]].
Discussion
Have you encountered a cardboard display failure in your retail projects? What went wrong, and how was it resolved? Sharing specific cases helps the entire industry avoid the same expensive lessons.