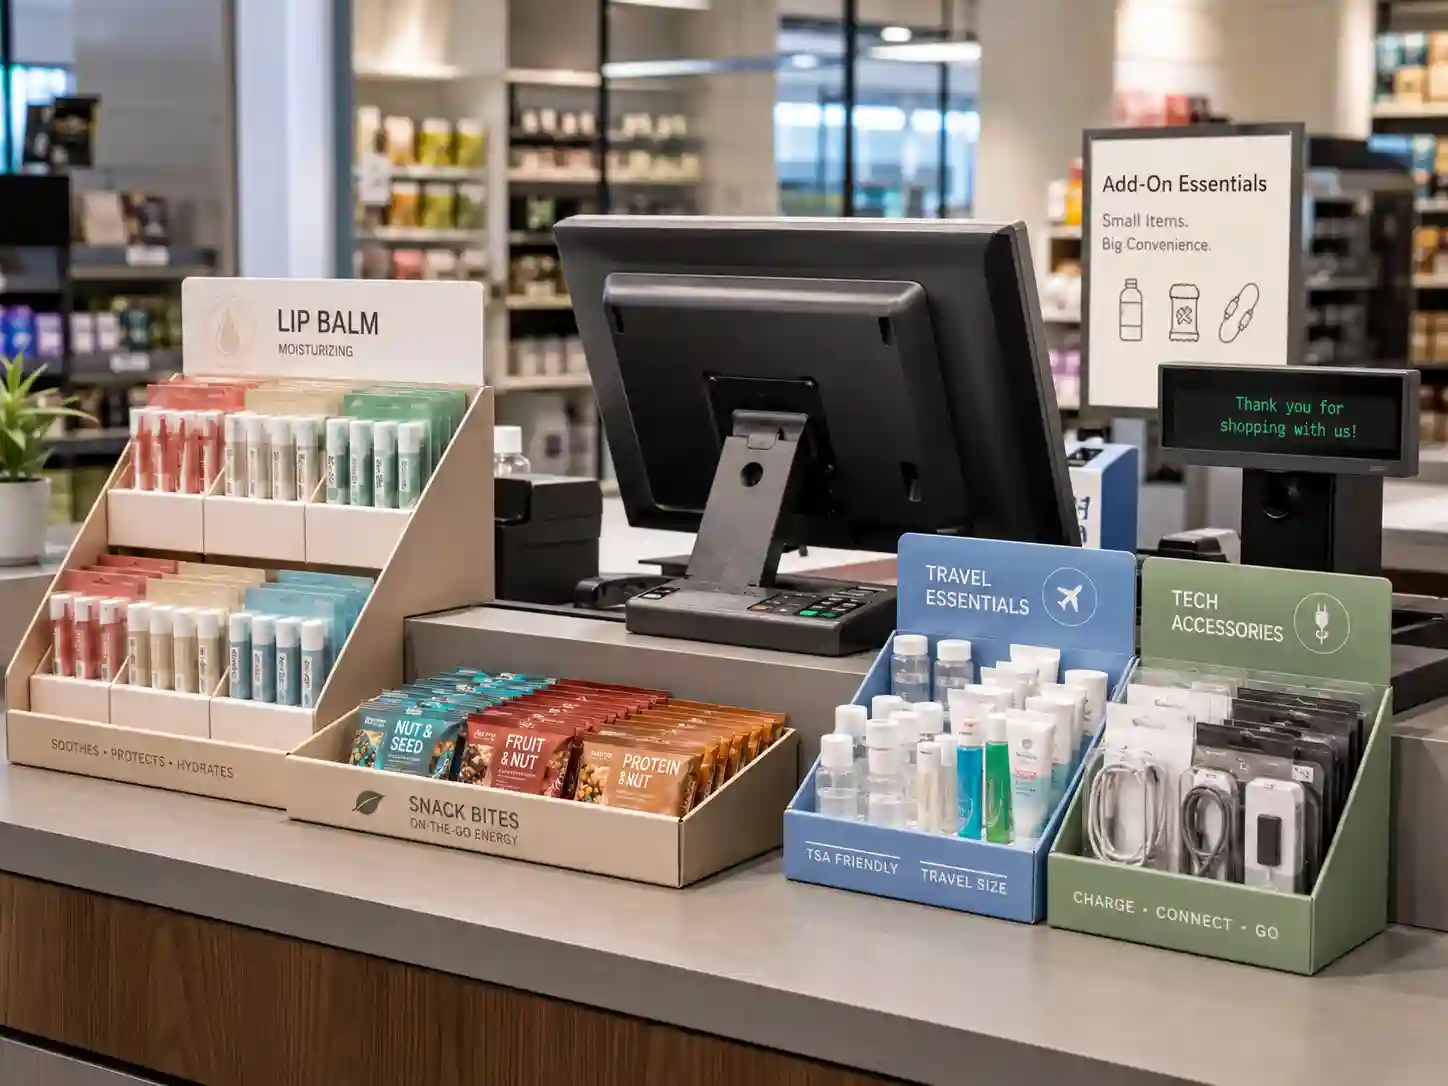
A cardboard display for checkout add-on products has one clear job: help shoppers pick up small items before they leave the store. For B2B buyers, the right structure depends on product weight, store layout, refill frequency, shipping method, and how much brand space the display needs.
Checkout products are usually small, low-to-medium price items that work well near cash registers, service counters, queue lines, end caps, and convenience-store payment zones. Lip balm, candy, travel-size packs, batteries, small toys, cosmetics, trial-size skincare, gift cards, stationery, and promotional bundles all need different display decisions.
At Leader Display, we look at checkout displays from a production and retail-use angle. A good design must look clean, hold stock safely, assemble quickly, ship flat when possible, and make refilling easy for store staff.
Why Checkout Add-On Products Need a Specific Display Strategy
Checkout areas are busy. The shopper is standing, waiting, paying, or making a quick last decision. That means the display cannot be confusing.
A display for checkout add-on products must communicate fast. The product should be visible, the price area should be clear, and the structure should not take up more space than the retailer allows. For many retail buyers, counter space is valuable, so every centimeter has to support sales.
This is why a standard product tray is often not enough. A checkout display may need a header card, stepped shelves, compartments, hooks, dividers, or a small footprint that still holds enough inventory for several selling days.
For brand owners and trade marketers, the key question is not only “Which display looks good?” It is “Which display can survive shipping, setup, customer handling, and repeated refilling while keeping the product easy to buy?”
Main Display Types for Checkout Add-On Products
Different checkout items need different cardboard structures. Below are the most common choices for B2B retail programs.
Counter Display Units
Counter display units are the classic option for small add-on products. They sit on checkout counters, service desks, pharmacy counters, beauty counters, and convenience-store payment areas.
They work well for lightweight products such as lip balm, sachets, mini cartons, candy packs, small boxed items, and travel-size goods. A counter display can use tiered shelves, product cells, divider slots, or simple open trays.
A strong counter display should have enough board thickness to avoid sagging. For small products, E-flute corrugated board or mounted paperboard can work well. For heavier items, we may increase the board grade, add internal support panels, or use double-wall reinforcement in the base.
Counter displays are easy to ship flat or semi-assembled. For export projects, flat packing can reduce carton volume and freight cost, but the assembly method must be simple enough for retail staff or distributors.
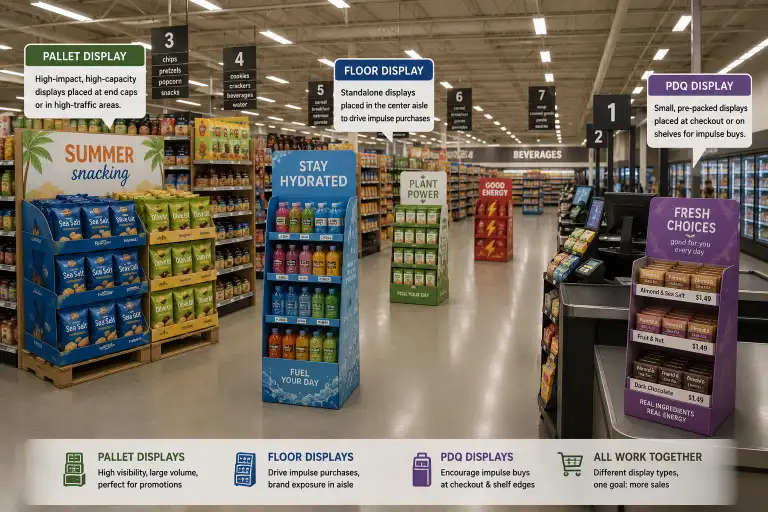
PDQ Displays
PDQ displays are built for fast retail setup. PDQ means “pretty darn quick” in retail use, and the structure is designed so the product can arrive pre-packed or nearly ready to place on shelf or counter.
A PDQ display is often the best choice when the buyer wants faster merchandising across many stores. It is useful for small FMCG items, seasonal add-ons, trial packs, and promotional multipacks.
Compared with a standard counter display, a PDQ often focuses more on operational speed. It may include a tear-away shipping cover, pre-loaded product slots, and a compact tray that can move from master carton to checkout area with less handling.
For brands managing high-volume retail rollouts, PDQ displays can reduce setup mistakes. They also help maintain product presentation because each unit is designed around the exact pack size and count.
You can explore more structure options through our custom cardboard displays page.
Small Peg Displays
Peg displays are useful when products hang from holes, tabs, blister packs, small pouches, or header-card packaging. At checkout, peg displays can be countertop units or small floor-standing units placed near queue lines.
They work well for phone accessories, small tools, travel items, batteries, hair accessories, keychains, and other lightweight hanging products. The key detail is peg load.
A manufacturer should check the total weight per hook, the hook spacing, the backing board strength, and whether the display may lean forward after loading. For heavier hanging products, we may add rear support, side wings, a stronger base, or plastic hooks instead of paper hooks.
Small peg displays also need clear product spacing. If products overlap too much, shoppers may not see the full range. If spacing is too wide, the display may waste retail space.
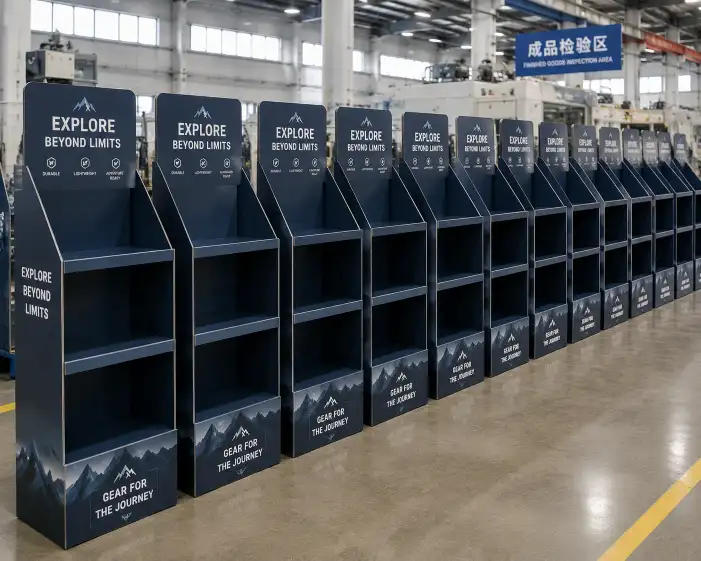
Mini Floor Displays
Some checkout areas have limited counter space but more floor space near the queue. In that case, a slim floor display may perform better than a counter unit.
Mini floor displays are suitable for higher product counts, mixed SKU programs, and add-on categories that need stronger visibility. They can use shelves, hooks, dump sections, or mixed zones.
However, floor displays require more attention to stability. The base must be wide enough, the center of gravity should be controlled, and heavy products should stay on the lower shelves. For export, the display may need a flat-pack design with clear assembly steps, or a pre-assembled structure packed into a stronger master carton.
For buyers planning a retail campaign, this type works well when the add-on product needs more brand communication than a small counter tray can provide.
Dump Bin Displays
Dump bins are useful for loose or flexible add-on products, especially items that shoppers can pick quickly. They are common for snack packs, sample packs, small toys, promotional goods, and clearance items.
A dump bin is not always the best choice for premium products because it creates a casual presentation. But for value packs, impulse items, and high-volume promotional selling, it can be effective.
The structure needs a strong base, clean top edge, and enough depth to hold product without hiding it. A front cut-out can improve visibility and make it easier for shoppers to reach inside.
Quick Comparison Table for B2B Buyers
| Display Type | Best For | Placement | Key Structure Detail | Common Packing Method |
|---|---|---|---|---|
| Counter display | Small boxed, bottled, or packed items | Checkout counter | Tiered shelves, dividers, compact base | Flat packed or semi-assembled |
| PDQ display | Fast retail rollout, pre-packed goods | Counter or shelf | Tear-away shipper, product slots | Pre-loaded or nested in carton |
| Small peg display | Hanging pouches, blister packs, accessories | Counter or queue area | Hook load, back panel strength | Flat packed with hooks separate |
| Mini floor display | More SKUs or larger product count | Queue line or checkout zone | Stable base, shelf support | Flat packed or pre-assembled |
| Dump bin | Loose packs, promo items, value goods | Checkout floor area | Strong bin wall, easy reach-in opening | Flat packed or assembled |
This table is a starting point. The final decision should come from product size, unit weight, store rules, order quantity, and whether the display must be refilled many times.
How Product Weight Changes the Display Choice
Weight is one of the first details we check before suggesting a structure. A display that looks good in a rendering may fail if the shelf span, board grade, or glue area is not suitable for the loaded product.
For lightweight sachets or small candy packs, a simple counter tray or PDQ tray may be enough. For glass bottles, dense cosmetics, small jars, batteries, or metal accessories, the display needs stronger shelves and tighter structural planning.
A practical factory review should include:
- Single product weight
- Total display load
- Number of facings
- Shelf width and depth
- Refill method
- Expected retail handling
- Shipping route and carton stacking
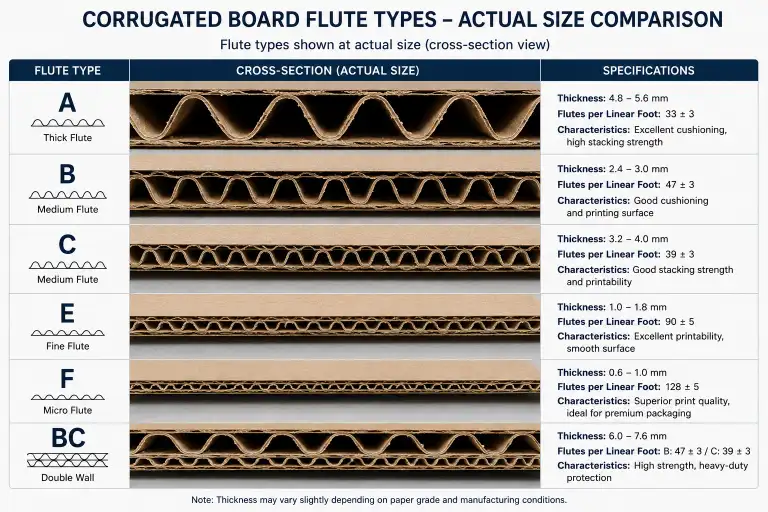
For heavier checkout products, we may use reinforced shelf lips, double-layer side panels, extra support inserts, or corrugated board with a stronger flute. The aim is to keep the display clean in-store without adding unnecessary cost.
Shelf, Counter, or Floor: Choosing the Right Placement
Placement decides the shopper’s viewing angle. A counter display is seen from close range, often at hand level. A floor display is seen from a distance first, then approached. A peg unit may need both front visibility and side stability.
Counter Placement
Counter placement works best when the product is small, easy to grab, and linked to a fast buying decision. The display should not block payment equipment or staff movement. Many retailers will limit display width and height, so compact engineering matters.
Shelf Placement
Shelf-ready PDQ trays are useful when the checkout zone includes retail shelving behind or beside the counter. The display should fit shelf depth and leave the front product face visible.
Floor Placement
Floor placement gives more space for branding and product count. It also requires stronger anti-tip design. If the display is placed near a queue, the base must handle light bumps from shoppers and carts.
For broader structure references, our cardboard display solutions page shows common display formats used across retail categories.
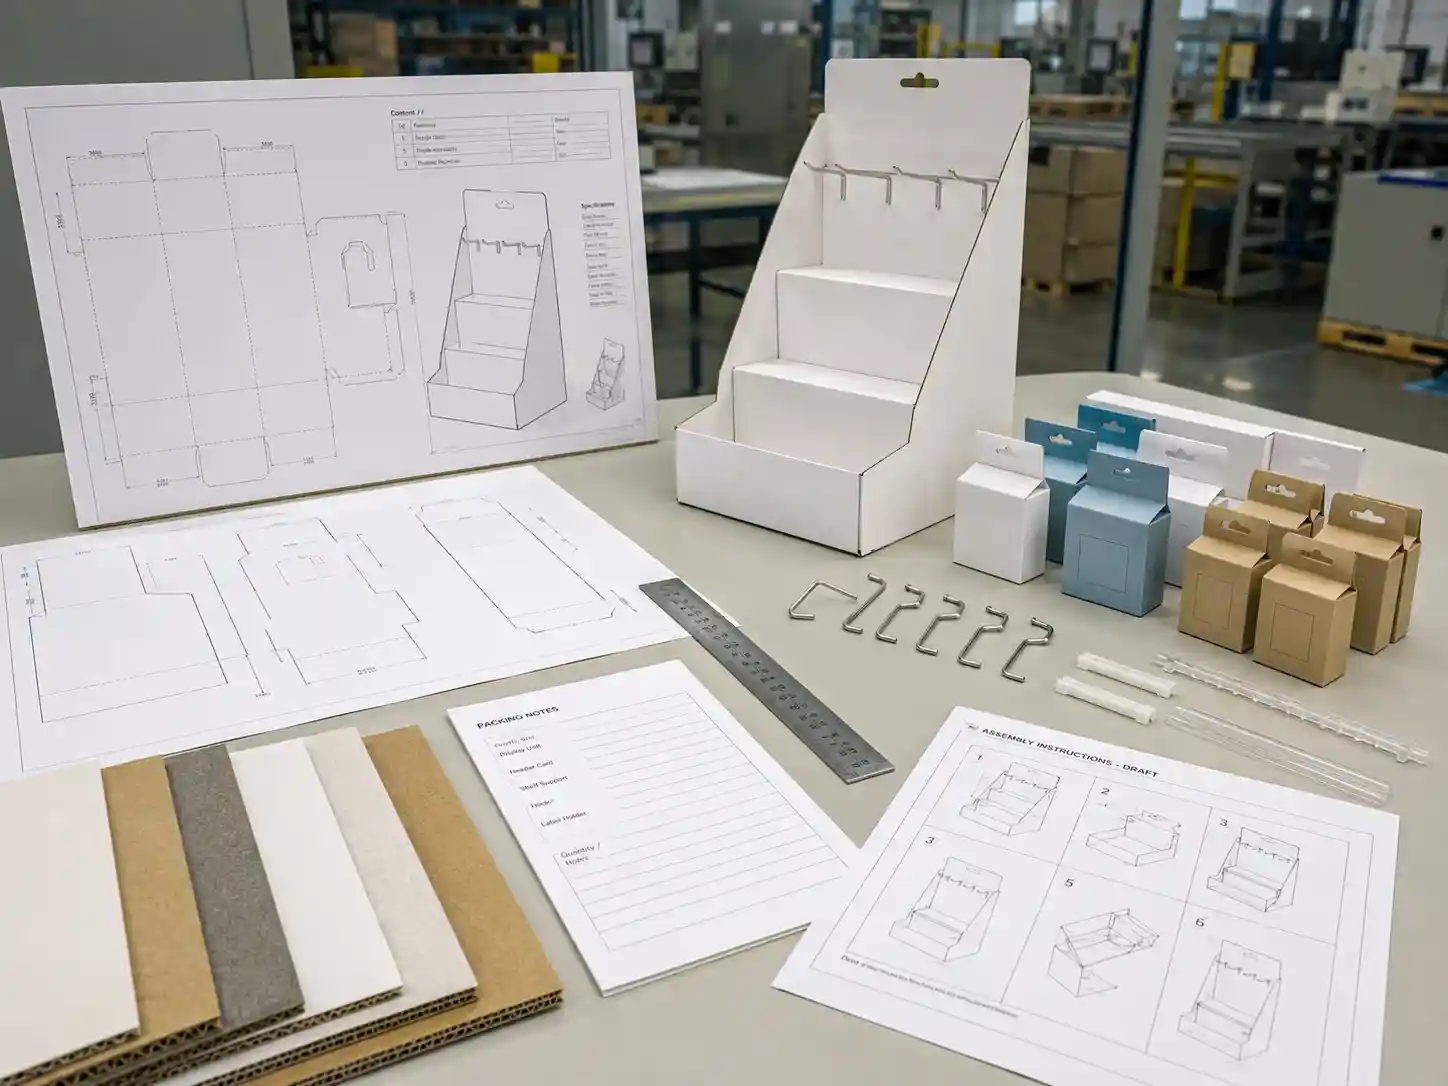
Sampling Before Bulk Production
For checkout add-on products, sampling is not a cosmetic step. It is a risk-control step.
A physical sample helps check product fit, shelf angle, header height, product visibility, barcode access, and assembly logic. It also helps the buyer see whether the display can be packed flat or needs partial assembly before shipment.
A good sample review should answer clear questions:
Does the product stay upright?
Can shoppers remove one item without disturbing the rest?
Can staff refill the display quickly?
Does the header card remain straight?
Does the display hold full product weight for the expected retail period?
Short answers help move the project forward.
During sampling, print quality and finishing can also be checked. Matte lamination, gloss lamination, spot UV, embossing, and foil effects can improve shelf presence, but they should fit the product category and retail budget. For checkout displays, clean graphics and clear pricing space often matter more than heavy decoration.
Material Choice and Sustainability Considerations
Many buyers now ask about recyclable materials, FSC paper options, and responsible sourcing. FSC is often referenced in packaging procurement because it relates to forest-based material sourcing. For some projects, buyers may also request supplier quality systems aligned with ISO standards.
Material choice should match the display’s job. A low-load counter tray may use lighter paperboard. A multi-shelf floor unit needs stronger corrugated board. A premium beauty counter display may use mounted board with high-quality printing for a cleaner finish.
FEFCO standards are also useful in export packaging conversations because they provide recognized codes for corrugated packaging styles. While retail displays often use custom structures, export cartons and shipping boxes may still follow common corrugated formats.
From a manufacturer’s side, the goal is to avoid over-engineering and under-engineering. Over-engineering wastes cost. Under-engineering creates store complaints, collapsed displays, or poor product presentation.
Assembly and Refill Details Buyers Should Confirm
Assembly is often overlooked in the buying stage. A display that takes too long to assemble can create problems during a rollout.
For B2B programs, we suggest confirming:
- Whether the display ships flat, semi-assembled, or pre-packed
- How many steps are needed for setup
- Whether tools or tape are required
- How products load into shelves, hooks, or compartments
- Whether staff can refill from the front
- Whether the display remains stable when half empty
- Whether instruction sheets are needed in each carton
Refill behavior matters because checkout displays often sell small products fast. If staff cannot refill the unit cleanly, the display may become messy. A tiered tray with dividers can keep products organized. A PDQ tray can support faster replenishment. A peg display can show multiple SKUs clearly, but hooks must stay aligned after repeated use.
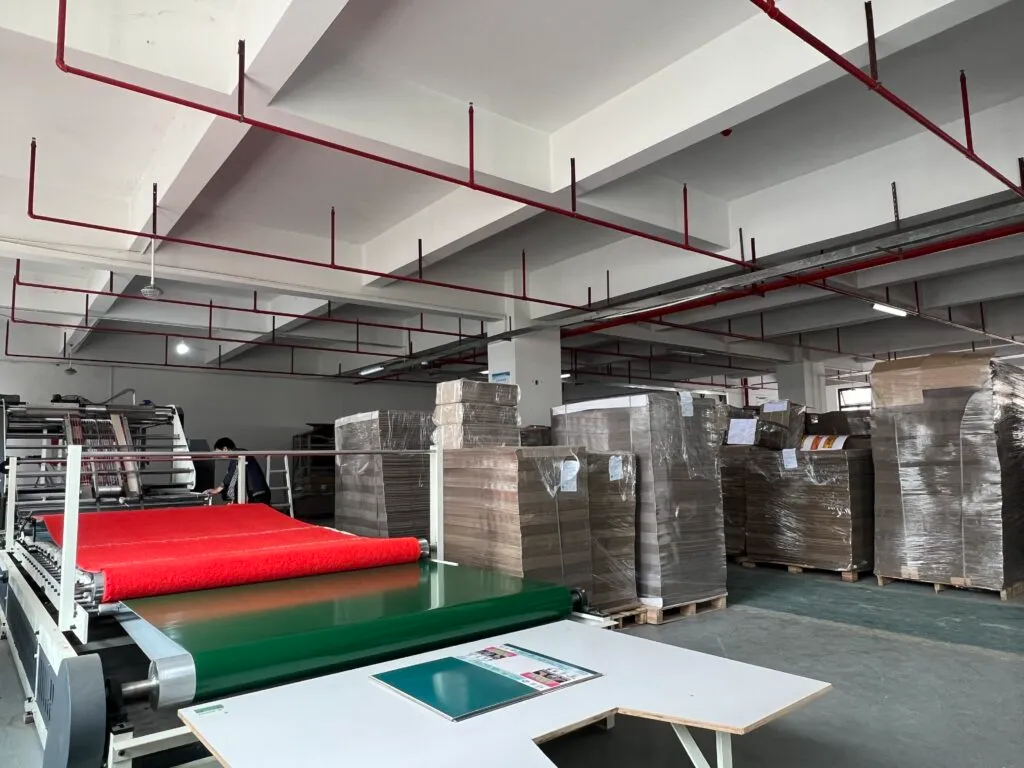
Flat Packing and Export Packing
For overseas buyers, packing method can affect total project cost. Flat packing reduces volume and may lower freight pressure. Pre-assembled packing saves store setup time but increases carton size.
The right choice depends on order quantity, retail labor conditions, product loading plan, and delivery schedule.
For export packing, we check master carton strength, stacking direction, moisture protection, corner protection, and whether printed surfaces need extra protection. If displays are shipped with products inside, the packaging plan becomes more complex because the display must protect both the structure and the merchandise.
A practical export packing plan may include:
- One display per inner carton for premium programs
- Multiple flat-packed displays per master carton
- Printed assembly instruction sheet
- Product loading guide
- Protective paper or polybag when needed
- Carton marks for warehouse handling
Strong packing does not need to be complicated. It needs to match the route, product value, and retailer setup method.
Matching Display Type to Product Category
A cardboard display for checkout add-on products should be chosen by product behavior, not only by appearance.
Beauty and Personal Care
Lip balm, mini skincare, sheet masks, travel-size tubes, and small cosmetics often need clean product separation. Counter displays and PDQ trays work well. For premium beauty, the display surface should feel neat, with enough room for brand blocks and shade names.
Snacks and Candy
Candy, gum, snack packs, and seasonal treats often need high stock count. PDQ displays, counter trays, and dump bins are common. The structure should allow fast grabbing and easy refill.
Accessories and Small Tools
Phone accessories, keychains, batteries, and small hardware items often work better with peg displays. Hook strength and backing support are important. Product spacing should avoid clutter.
Promotional and Seasonal Items
Seasonal checkout items may need fast setup and low unit cost. PDQ displays and compact floor displays are useful for short campaigns. Graphics should communicate the offer quickly.
Trial-Size and Sample Products
Trial packs often use small counter displays with compartments. The display must make the small product feel organized and worth picking up.
For buyers who need a custom structure across several product lines, Leader Display can develop display concepts based on product samples, retail placement, and packing requirements.
Common Mistakes to Avoid
One common mistake is choosing a display from a photo without checking size and weight. A similar-looking structure may not work if the product is heavier, taller, or packed in a different shape.
Another mistake is making the header too large for the checkout area. Big graphics can attract attention, but they may also block sightlines or break retailer rules.
A third mistake is ignoring the half-empty display. Many structures look good when full. The better test is how the display looks after shoppers remove half the products.
Buyers should also avoid unclear assembly. If a store team has to guess how to fold, lock, or load the display, setup quality will vary across locations.
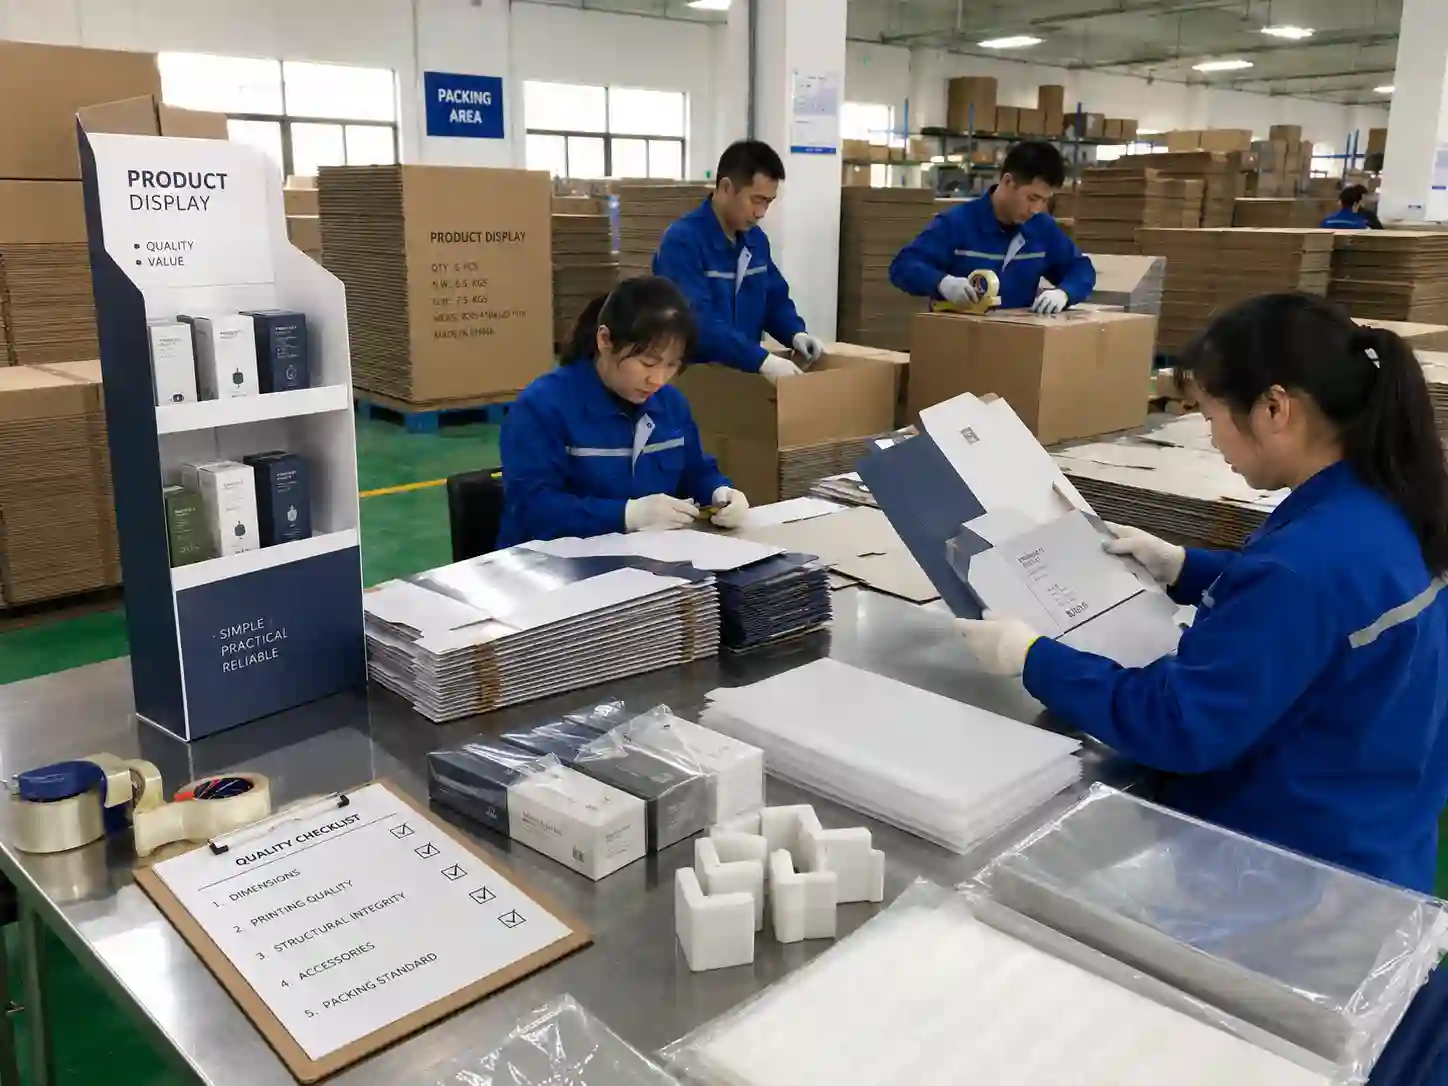
How a Manufacturer Should Support the Project
A practical cardboard display manufacturer should not only quote a price from a drawing. The factory should review the product, display purpose, retail placement, board material, printing method, packing plan, and expected loading.
At Leader Display, a typical project review includes product dimensions, product weight, target display count, display footprint, structural drawing, white sample, printed sample, material confirmation, bulk production, quality check, flat packing, and export carton planning.
This process helps reduce surprises before mass production. It also gives purchasing managers clearer information for internal approval.
What to Send Before Requesting a Quote
To get a more accurate proposal, prepare a few project details before contacting the factory:
- Product photos or samples
- Product size and weight
- Number of SKUs
- Target quantity per display
- Counter, shelf, or floor placement
- Retailer requirements, if available
- Preferred packing method
- Printing artwork or brand guideline
- Target delivery country
- Expected launch date
With these details, the manufacturer can suggest whether a counter display, PDQ display, peg display, mini floor display, or dump bin is the best direction.
Final Buying Guidance
For most lightweight checkout add-on products, a counter display or PDQ display is the safest first option. For hanging items, choose a small peg display. For larger stock volume or stronger visibility, consider a slim floor display. For loose promotional products, a dump bin may be the right fit.
The best cardboard display for checkout add-on products is the one that balances retail space, product load, shopper access, refill speed, packing cost, and brand visibility. When these details are handled early, the display becomes easier to approve, easier to produce, and easier to place in stores.
If your team is preparing a checkout launch, start with product size, weight, placement, and refill plan. From there, the structure can move from idea to sample, then into a display program ready for retail rollout.