A standee display should not become a problem for the store team. When a retail display is hard to unpack, confusing to assemble, or unstable after loading, the promotion loses time before it even reaches customers. For B2B buyers, easy installation starts long before delivery; it starts with structure, material choice, testing, packing, and clear assembly logic.
Why Easy Installation Matters for B2B Retail Projects
A standee display is often used for product launches, seasonal promotions, retail campaigns, and channel expansion. In these projects, speed matters. A store team may need to set up dozens or hundreds of displays across different locations within a short launch window.
If the installation process is slow, the display may stay in the back room. If parts are unclear, the store team may assemble it incorrectly. If shelves feel weak, staff may avoid loading enough products. These issues affect visibility, sell-through, and brand presentation.
From a manufacturer’s point of view, easy installation is not only about folding cardboard. It is about reducing store-side decisions. The display should tell the team what to do through its structure, packing order, printed instructions, and stable finished form.
A practical supplier should consider how the standee display moves through the full chain: sample approval, bulk production, flat packing, export carton packing, retail delivery, in-store setup, product refill, and disposal after the campaign.
Start With a Structure That Matches Store Reality
The first step is choosing a structure that fits the retail environment. A standee display for lightweight snacks does not need the same structure as one for bottled drinks, cosmetics, pet products, or hardware accessories.
Product Weight Comes First
Product weight affects almost every design decision. Shelf depth, corrugated grade, base structure, locking tabs, back panel strength, and side panel support all need to match the load.
For example, a standee display holding small sachets can use a lighter shelf system. A display holding glass jars or liquid bottles needs stronger shelf reinforcement, a wider base, and better weight distribution. If the structure is under-designed, the display may lean, sag, or fail during the campaign.
A practical cardboard display manufacturer should ask for product size, unit weight, quantity per shelf, total loading weight, and target shelf count before creating the design. These details help the factory select the right material and test the display in a controlled way.
Floor Placement Affects the Base
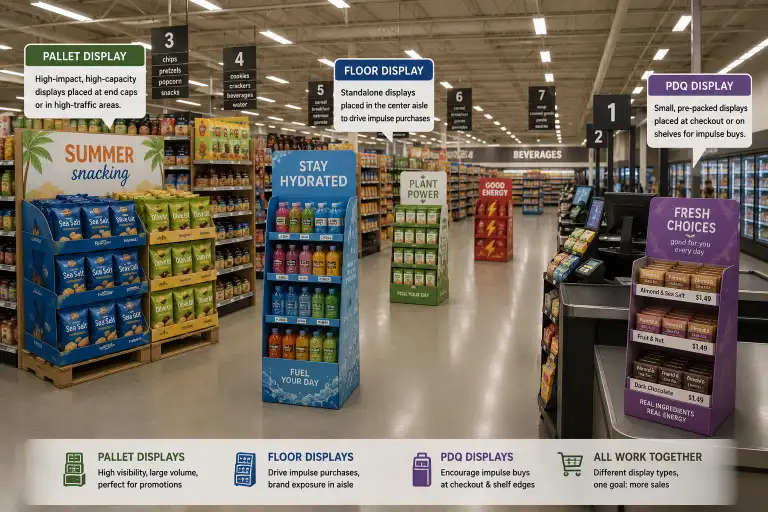
A floor standee display needs enough balance for supermarket aisles, convenience stores, pharmacy entrances, or promotional zones. A narrow base saves space, but it can reduce stability. A wider base gives better support, but it may not fit the retailer’s floor plan.
For B2B projects, the best option is often a balanced design: strong enough for retail use, compact enough for store approval, and simple enough for fast assembly. This is where factory experience matters. A display that looks good in a rendering still needs to stand safely in a crowded retail area.
For custom projects, buyers can work with a custom cardboard display manufacturer to match the structure to product weight, store placement, and shipment method.
Use Smart Locking Details Instead of Complicated Assembly
Store teams prefer displays that can be assembled without special tools. Screws, loose plastic parts, complex brackets, and unclear folding steps can slow down setup.
A good standee display should use simple structural details such as pre-cut slots, fold-in tabs, locking wings, reinforced shelves, and clear creasing lines. These details help the display open, lock, and stand with less effort.
Fewer Loose Parts Means Fewer Mistakes
Every loose part adds risk. A missing header card, shelf support, base insert, or side panel can delay installation. When possible, parts should stay connected to the main body or be packed in the order they are used.
For example, a display body with integrated side panels and pre-glued sections is often easier to install than a display with many separate panels. A header card can be pre-inserted or packed on top with clear markings. Shelf supports can be designed as fold-out parts instead of separate pieces.
Clear Crease Lines Help Store Teams Fold Correctly
Cardboard displays depend on accurate folding. If crease lines are weak, unclear, or placed in the wrong direction, the user may bend the panel incorrectly. This can damage print, weaken the structure, or make the display look uneven.
During sampling, the factory should check whether each fold opens smoothly and whether the structure locks without force. The goal is not only to pass a weight test, but also to make the first-time assembly process feel natural.
Plan the Display Around a Simple Setup Sequence
A standee display should have a logical setup path. The store team should not need to guess which panel opens first or where the shelf locks.
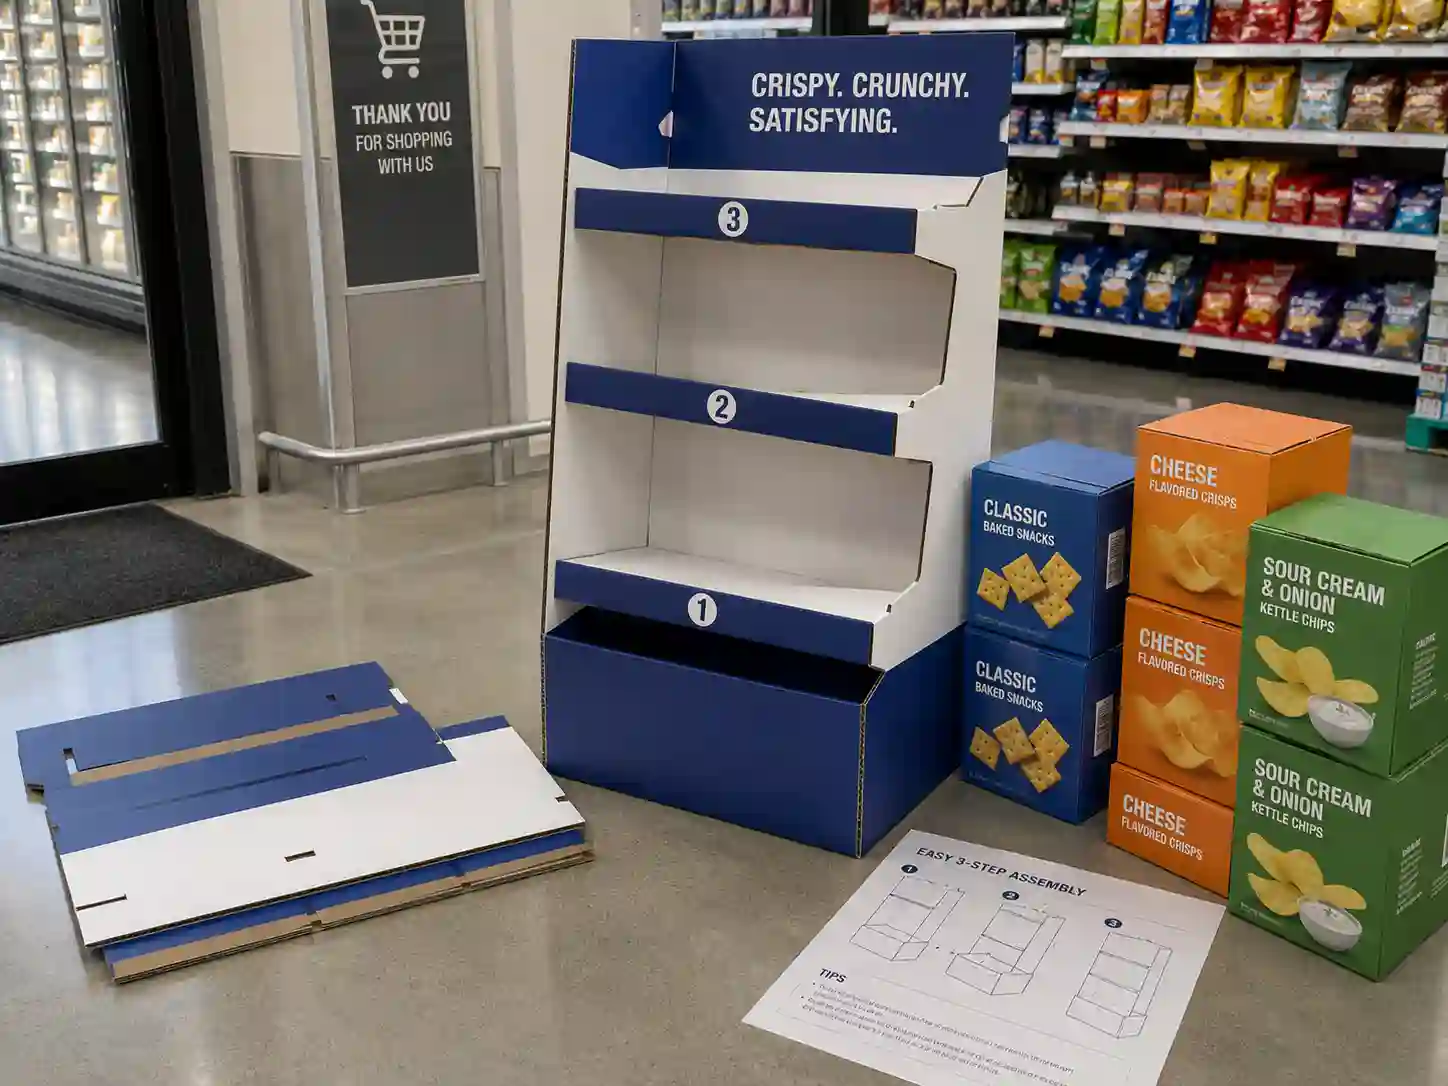
A common setup sequence may look like this:
| Installation Step | What the Store Team Should Do | Design Detail That Helps |
|---|---|---|
| 1. Open carton | Remove display body and accessories | Packing order matches assembly order |
| 2. Unfold main body | Open back panel, side panels, and base | Pre-glued body and visible crease lines |
| 3. Lock base | Fold bottom panels into position | Strong locking tabs and wide support |
| 4. Install shelves | Fold or insert shelves one by one | Numbered slots and reinforced edges |
| 5. Add header | Place header card at the top | Pre-cut slots or marked insertion points |
| 6. Load products | Place products by shelf plan | Tested shelf depth and weight capacity |
| 7. Check placement | Move to retail floor position | Stable base and clean product facing |
This table shows why installation ease is not one single feature. It comes from the full design system.
Material Choice Has a Direct Impact on Setup
Material selection affects strength, folding feel, print quality, shipping weight, and installation experience. Corrugated board is common for standee display production because it provides structure while staying lightweight for flat packing.
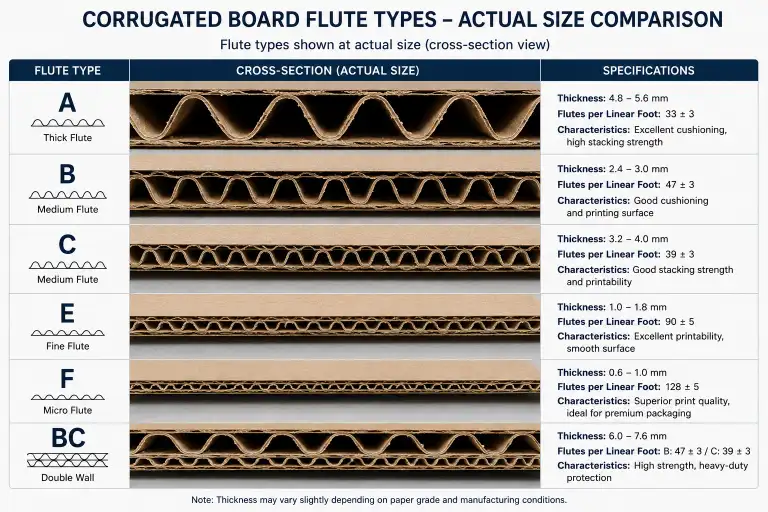
Corrugated Grade Should Match the Loading Plan
Different corrugated flute types and paper combinations can change the display’s performance. A stronger board may be needed for heavy goods or multi-shelf displays. A lighter board may be enough for single-use promotions with low product weight.
The right choice depends on the product, retail environment, campaign duration, and export packing requirements. Buyers can ask the supplier to explain the recommended board grade and why it fits the project.
When sustainability matters, buyers may request FSC-related paper sourcing or recyclable material options. FSC is widely recognized in responsible forest management discussions, while ISO systems are often used as references for structured quality management. For corrugated packaging formats and logistics communication, FEFCO references can also support clearer packaging discussions.
Surface Finishing Should Not Make Folding Hard
Lamination, spot UV, foil stamping, and heavy ink coverage can improve appearance, but they should not weaken folding areas. If a display needs many folds, the finishing plan should respect crease lines and locking tabs.
A premium surface is useful only when the display still assembles smoothly. During sample review, buyers should fold the sample, not only check the front view. This helps confirm whether the final retail team will face any setup difficulty.
For more display structure options, buyers can review custom cardboard display solutions and compare floor, counter, PDQ, sidekick, peg, and pallet display formats.
Sampling Should Test Assembly, Not Only Appearance
Many buyers focus on print color, logo size, and visual layout during sample approval. These points matter, but assembly testing matters as much.
A good sample test should answer practical questions:
Can one person assemble the standee display without tools?
Does the base lock firmly?
Do the shelves stay level after loading?
Can the header be inserted without bending?
Do products fit the shelf depth?
Is there enough clearance for refill?
Can the display be moved a short distance after loading?
Short questions work.
If the sample is hard to assemble in the factory, it will be harder in store. If the sample needs extra explanation during a video call, the instruction sheet may need improvement. If the shelves are hard to lock, the slot design may need revision.
Weight Testing Builds Confidence
For displays that hold bottles, jars, cans, cartons, or dense products, load testing is important. The factory should place the planned product weight on each shelf and observe shelf bending, side panel pressure, base stability, and long-duration standing performance.
This is also the right stage to adjust board grade, shelf support, glue points, and base size. Changes made during sampling are cheaper than fixing problems after bulk production.
Assembly Videos Can Reduce Store-Side Confusion
For large rollouts, an assembly video can help distributors, sales teams, and retail staff. A short video showing carton opening, body unfolding, shelf locking, header installation, and product loading can reduce mistakes.
The printed instruction sheet should still be included. Not every store team will watch a video. The best approach is to use both: a simple paper guide inside the carton and a QR code linking to the setup video when needed.
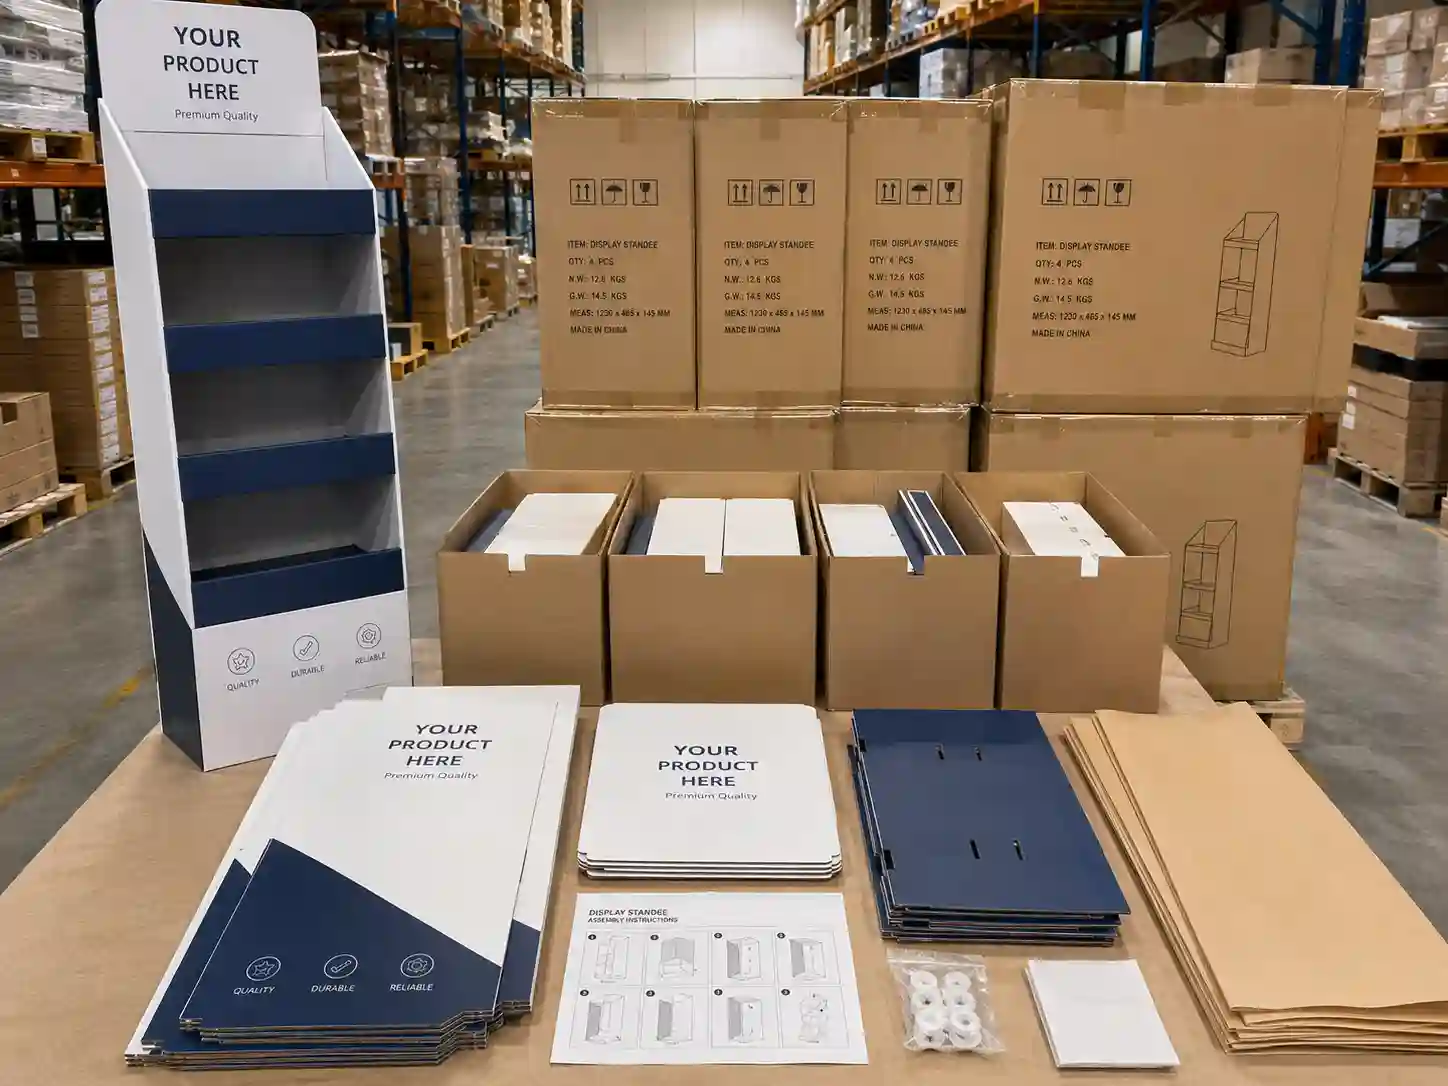
Flat Packing Must Support Fast Installation
Flat packing saves shipping space, especially for international B2B orders. However, flat packing should not make store setup harder. The packing method needs to protect parts and support the setup sequence.
Pack Parts in the Order of Use
If the header card is needed near the end, it should not be buried under heavy panels in a way that causes bending. If shelves are installed in a certain order, they can be grouped or numbered. If the display has small accessories, they should be placed in a clearly marked inner bag or paper sleeve.
A store team should open the carton and understand the contents at a glance.
Protect Printed Areas During Export
Export packing needs to prevent scratches, crushed corners, moisture exposure, and pressure marks. Master cartons should match the flat display size, not leave too much empty space. Protective paper, inner cartons, corner protection, and carton marks can all help.
For bulk projects, clear carton labels also matter. Carton marks can show item name, quantity, display version, destination, and opening direction. Generic carton marks are often enough when buyers want to avoid retail brand exposure during transport.
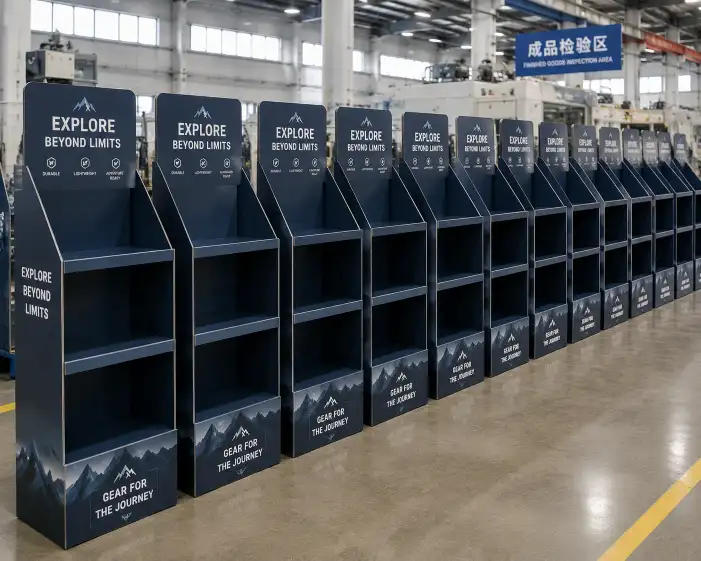
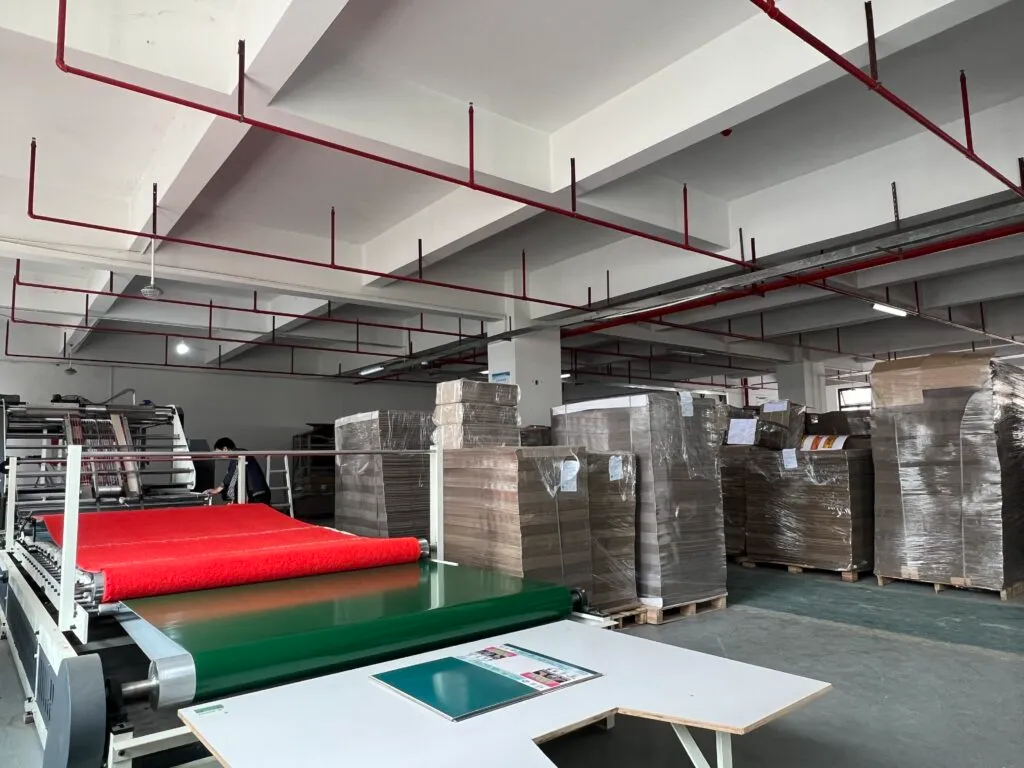
A supplier with export experience should consider carton strength, pallet stacking, sea freight handling, warehouse storage, and final store distribution. Leader Display has worked as a practical paper display and packaging manufacturer since 2004, supporting B2B buyers with custom structure, sampling, production, and export packing through Leader Display factory support.
Refill Design Makes the Display Easier to Use After Setup
Installation does not end after the display stands on the retail floor. Store staff still need to refill products, clean the area, and keep the display looking presentable during the campaign.
A standee display with poor refill access may look full on day one and messy by day three. Shelf height, product facing, side panel depth, and front lip height all affect refill efficiency.
Shelf Depth Should Fit the Product Pack
If the shelf is too shallow, products may fall forward. If it is too deep, products may sit too far back and lose visibility. The best shelf depth depends on the product pack size and how many units should face forward.
For small retail packs, a front lip can keep products aligned. For taller cartons or bottles, side support and back support help keep the product in position. For promotional multipacks, shelf spacing should allow staff to place and remove items without scraping the header or upper shelf.
Clear Product Facing Helps Sales Teams
A well-designed standee display supports neat product facing. This is useful for trade marketing teams, distributors, and retail buyers who care about brand presentation. The display should help products sit straight, show labels clearly, and maintain a clean aisle look.
This is why display design should consider the product, not only the graphic panel. Print attracts attention, but structure keeps the promotion working.
Installation Instructions Should Be Short and Visual
Long instruction sheets are easy to ignore. A practical instruction sheet should use simple diagrams, step numbers, arrows, and part names. Text should be limited and direct.
For export projects, English instructions are common, but some buyers may request bilingual instructions for local teams. The instruction sheet should match the real display parts used in bulk production. If the design changes after sampling, the instruction sheet should be updated too.
Numbering Helps Multi-Part Displays
Numbered parts can reduce assembly errors. For example, shelf 1, shelf 2, and shelf 3 can match numbered slots. Header direction can be marked with “front” or an arrow. Base panels can include small printed marks on hidden areas to guide folding.
These small details cost little compared with the value they create in the store.
Common Mistakes That Make Installation Hard
Some standee display problems appear again and again in retail projects. B2B buyers can avoid them by discussing installation during the design stage.
One mistake is choosing a display structure based only on appearance. A slim shape may look modern, but it may not support heavy products. Another mistake is using too many separate parts. A display with many small pieces may be cheaper to ship, but it can create confusion in store.
A third mistake is skipping loaded sample testing. Empty samples can look strong. Loaded samples reveal shelf bending, base movement, and refill problems. A fourth mistake is ignoring carton packing. If parts arrive bent, scratched, or mixed together, the installation experience suffers before assembly starts.
Good design prevents these problems early.
What Buyers Should Send Before Requesting a Quote
To create an easy-install standee display, the factory needs clear project information. Buyers can prepare the following details before asking for pricing:
Product dimensions and unit weight.
Number of products per shelf.
Target shelf count.
Retail placement, such as aisle, entrance, checkout, endcap area, or promotional zone.
Campaign duration.
Expected order quantity.
Shipping destination and packing requirements.
Artwork files or brand guideline.
Sample deadline and launch deadline.
With this information, the supplier can recommend a structure, estimate material requirements, plan sampling, and quote with fewer assumptions.
For related structure planning, buyers can explore retail cardboard display options and use the product details above to start a more accurate design discussion.
How a Manufacturer Makes Installation Easier
A practical cardboard display manufacturer does not wait for installation problems to happen. The process should include structure review, material selection, sample cutting, assembly testing, weight testing, print checking, packing testing, and clear communication before bulk production.
At Leader Display, the goal is to make the standee display practical for both the brand buyer and the retail team. That means the display should look clean, hold the planned products, ship flat when needed, arrive protected, assemble without tools, and support refill during the promotion.
The next step is simple: prepare product size, product weight, target retail placement, and campaign quantity, then send the details to the factory team so the structure can be built around real store use from the first sample.