Buyers who understand how cardboard displays are made consistently get better quality, fewer production delays, and fewer surprises at the receiving dock. The reason is simple: when you know what happens at each step — from structural design to die cutting, printing, assembly, and export packing — you know what to check before the factory starts bulk production, what to confirm during the sample stage, and what to inspect before shipment.
This guide covers the full cardboard display manufacturing process for retail POP displays, including the design and engineering phase, material selection, printing and finishing, die cutting and creasing, stripping and folding, assembly and gluing, quality control, and export packing. Each section explains what the factory does, what the buyer should verify, and how the step affects the final display quality.
About the factory: Leader Display has been manufacturing cardboard displays and paper packaging since 2008, serving clients across the US, Australia, the UK, and Europe with structural design, sample making, bulk production, and export packing.
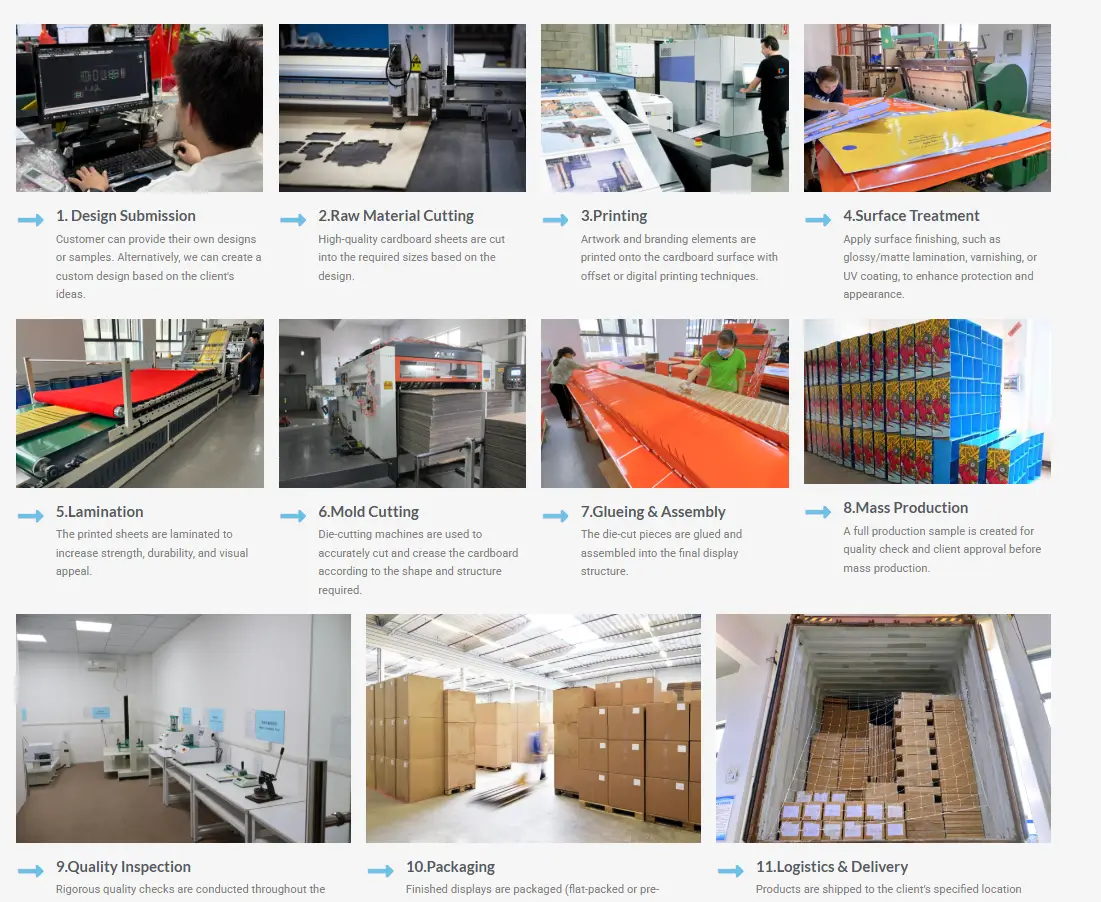
Step 1: Structural Design and Engineering
Every cardboard display starts as a structural design. The factory's engineering team creates a 3D CAD model based on the product dimensions, weight, SKU count, and retail display requirements.
What the factory does:
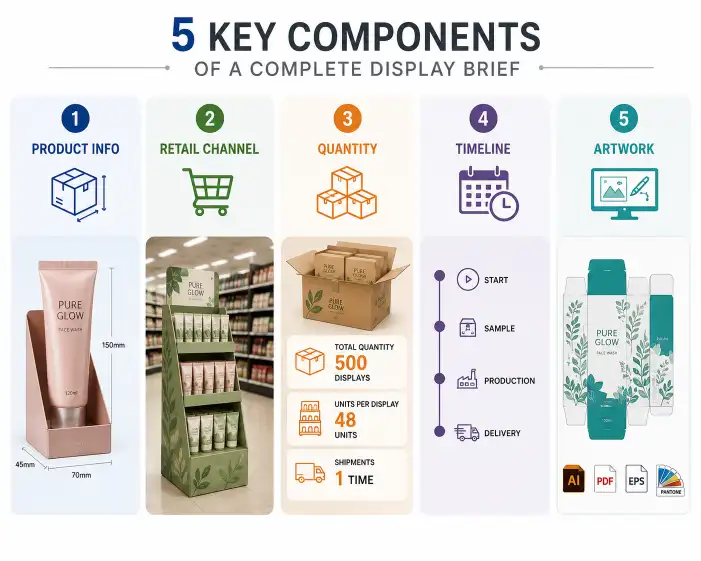
- Receives the product dimensions, weight, and quantity per display from the buyer.
- Builds a 3D structural model using CAD software (ArtiosCAD or similar industry-standard tools).
- Determines the board grade (E-flute, B-flute, double-wall, or single-face), panel layout, and joint method.
- Generates a dieline — the flat 2D cutting template that guides the die cutting step.
- Produces a blank sample (unprinted) for the buyer to test product fit, loading direction, and assembly logic.
What the buyer should verify:
- Confirm the dieline matches the product size and loading direction.
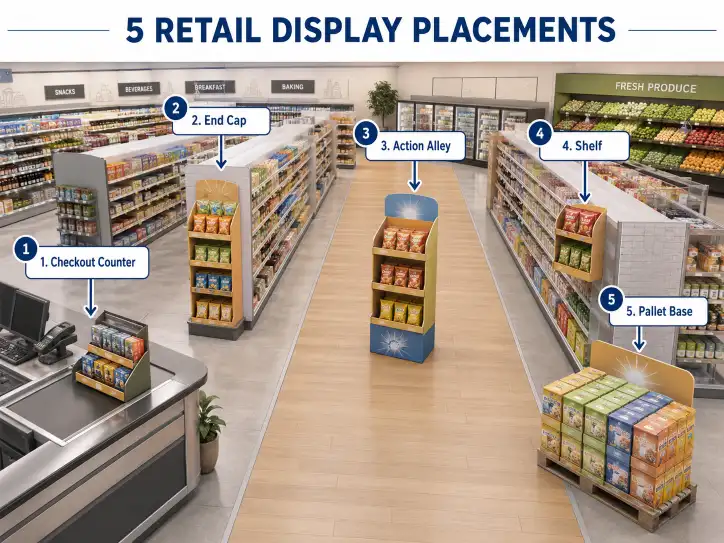
- Check that the shelf height, tray depth, and product opening direction work for the retail environment.
- Verify the display footprint matches the retailer's pallet or shelf dimension requirements. For retailer-specific specifications, see our [[Pallet Display Sizes- Standard Dimensions + Retailer Spec Matrix|Pallet Display Sizes and Retailer Spec Guide]].
- Approve the blank sample before the factory moves to printing.
Typical timeframe: 1–3 days for standard structures; 3–7 days for complex designs with multiple SKUs or special mechanisms.
Buyer takeaway: The structural design phase is the cheapest time to make changes. Once the die is cut and printing plates are made, revisions cost time and money. Never skip the blank sample approval.
Step 2: Material Selection and Board Grade
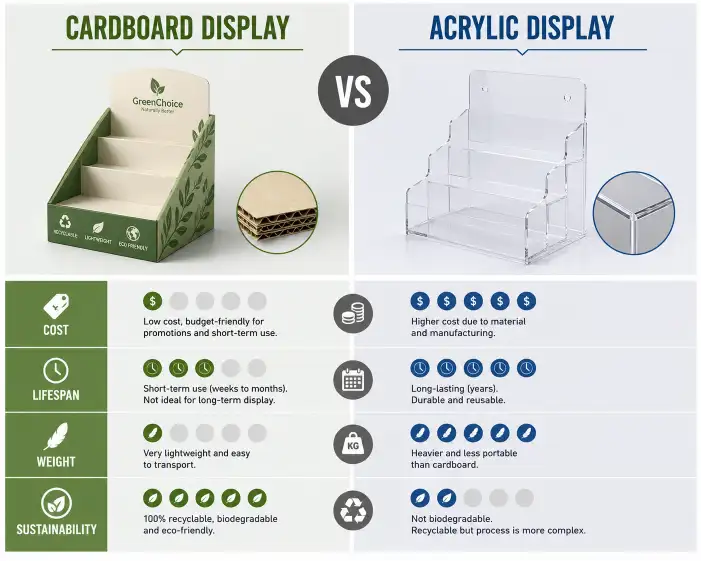
The factory selects the corrugated board grade based on the product weight, display structure, and shipping requirements.
Common board grades for cardboard displays:
| Board grade | Typical thickness | Best for | Common applications |
|---|---|---|---|
| E-flute | 1.5–1.8 mm | Light products (under 1 lb), high-quality printing | Counter displays, PDQ trays, small shelf displays |
| B-flute | 2.5–3.2 mm | Medium-weight products (1–5 lb), good structural strength | Floor displays, sidekicks, shelf pallet displays |
| C-flute | 3.5–4.0 mm | Heavy products (5–10 lb), maximum stacking strength | Pallet displays, large floor displays, bulk packaging |
| E/B-flute (double-wall) | 4.5–5.5 mm | Very heavy products (10+ lb), high stacking loads | Full pallet displays, club store displays, export-heavy programs |
| Single-face corrugated | 1.0–1.5 mm | Lightweight wrapping, thin protective layers | Inner packaging, layer pads, product separators |
What the factory does:
- Recommends the board grade based on the product weight, display height, and stacking requirements.
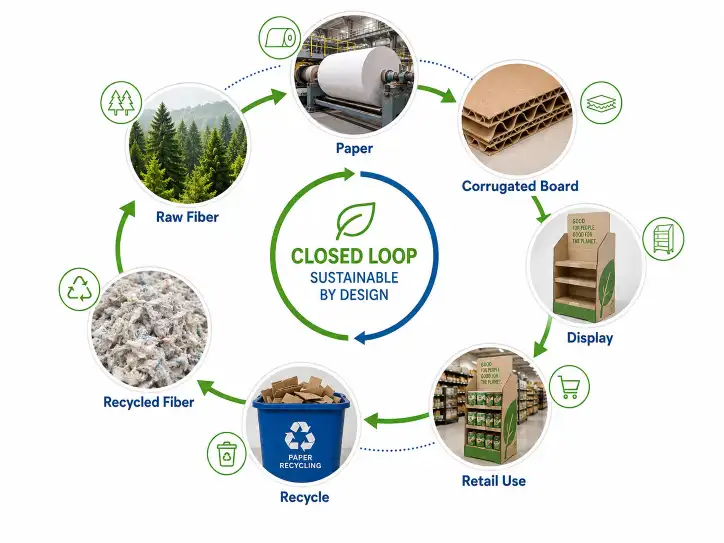
- Sources the board from certified suppliers — FSC-certified recyclable materials are standard.
- Tests the board for thickness consistency, moisture content, and compression strength before production.
What the buyer should verify:
- Confirm the board grade is appropriate for the product weight (a pallet display for 10 lb bags needs double-wall; a counter display for lipstick can use E-flute).
- If the display will be shipped internationally or stacked in a warehouse, confirm the board grade accounts for stacking pressure.
- Ask the factory what material certification they provide (FSC, recyclability claims).
- Check the board condition on arrival — warped or moisture-damaged board causes printing and assembly defects.
Related: See our [[Display Materials Guide|Display Materials Guide]] for a deeper comparison of corrugated board types and their structural properties.
Step 3: Printing — Flexo, Offset, and Digital
Once the dieline is approved and the board grade is confirmed, the factory moves to printing. The printing method affects the cost, quality, and production speed.
Common printing methods for cardboard displays:
| Printing method | Best for | Quality | Cost | Run size |
|---|---|---|---|---|
| Flexographic (flexo) | Large runs, simple graphics, solid colors | Good — consistent color, limited fine detail | Low per-unit at volume | 5,000+ units |
| Offset (litho) | High-quality graphics, fine detail, photographic images | Excellent — sharp detail, wide color gamut | Medium | 1,000–10,000 units |
| Digital | Short runs, variable data, rapid prototyping | Very good — fast setup, no plate cost | Higher per-unit | 50–2,000 units |
What the factory does:
- Prepares artwork files for the selected printing method (color separation, proofing, plate making for flexo/offset).
- Runs a printed sample for buyer approval — color accuracy, registration, print placement relative to the dieline.
- Adjusts color and registration before the full production run.
What the buyer should verify:
- Approve the printed sample under retail lighting conditions (fluorescent and natural light).
- Check that print positioning aligns correctly with the dieline — off-register printing on a fold line wastes entire panels.
- Confirm PMS (Pantone) colors if brand color accuracy is critical — CMYK approximations can shift between runs.
- For large-format displays (pallet displays with headers and side panels), verify that panel-to-panel color consistency is maintained across all printed sheets.
Related: See our [[Custom Display Printing and Finishing Methods Guide|Custom Display Printing and Finishing Guide]] for detailed comparisons of printing methods, setup costs, and quality expectations.
Step 4: Lamination and Surface Finishing
After printing, the board may receive a surface finish to improve durability, appearance, or both.
Common finishes:
| Finish type | Appearance | Durability | Best for |
|---|---|---|---|
| Gloss lamination | Shiny, reflective | High — protects against scuffs and moisture | High-traffic retail displays, food and beverage promotions |
| Matte lamination | Flat, non-reflective | High — hides fingerprints well | Premium brand displays, cosmetics, luxury goods |
| Aqueous coating | Clear, thin protective layer | Medium — light scratch protection | Short-term promotions, disposable displays |
| UV spot coating | Glossy highlight on specific areas | Medium — visual accent only | Highlighting logos or product images |
What the factory does:
- Applies the selected lamination or coating using industrial laminating machines.
- Cuts the laminated sheets to size and prepares them for die cutting.
- Checks for delamination, bubbles, or uneven coating coverage.
What the buyer should verify:
- Confirm the finish suits the retail environment (gloss for high-traffic areas, matte for premium positioning).
- For export shipments, ensure the finish can withstand container humidity and temperature changes without delaminating.
- If the display will be stored for more than 3 months before retail use, check that the lamination does not yellow or peel.
Step 5: Die Cutting and Creasing
Die cutting is the step where the flat printed sheet is cut into the precise shape of the display. Creasing creates the fold lines that allow the board to bend cleanly.
What the factory does:
- Creates a custom steel-rule die based on the approved dieline. The die includes cutting rules (sharp, vertical blades) and creasing rules (blunt, rounded edges for folding).
- Mounts the die on a flatbed or rotary die cutting press.
- Feeds the printed and laminated sheets through the press, cutting and creasing in a single pass.
- Inspects the first run for cut accuracy, crease alignment, and clean edges.
Die cutting methods:
| Method | Best for | Precision | Speed |
|---|---|---|---|
| Flatbed die cutting | Complex shapes, thick board, small-to-medium runs | Highest | Slower |
| Rotary die cutting | Simple shapes, thin board, large runs | High | Fast |
| Laser cutting | Prototypes, ultra-complex shapes, no die cost | Highest | Slow |
What the buyer should verify:
- The die cut must match the approved dieline exactly — a 1 mm shift can cause the display to not lock together.
- Crease lines must be deep enough to fold cleanly but not so deep that the board cracks.
- Check that stripping waste (skeleton) around the cut pieces is complete — partially stripped sheets cause assembly line jams.
Step 6: Stripping (Skeleton Removal)
After die cutting, the waste material — called the skeleton or matrix — must be removed from the cut sheets.
What the factory does:
- Strips the excess board away from the die-cut display pieces manually or with an automatic stripping machine.
- Separates the individual display components (shelves, trays, side panels, headers, base) for the next step.
- Verifies that all pieces are present and undamaged before folding and gluing.
What the buyer should verify:
- Confirm the stripping is complete — small waste tabs left on the edges can prevent the display from fitting together.
- Check that delicate die-cut features (such as product cutouts, lock tabs, or display windows) are intact and not torn during stripping.
- For large programs, ask the factory to send photos of the stripped sheets before assembly begins.
Step 7: Folding, Gluing, and Assembly
The stripped display components are folded along the crease lines and glued into their final structural form.
Assembly types:
| Assembly level | What the factory does | Buyer benefit |
|---|---|---|
| Flat-packed (KD) | Folded and glued flat — the buyer or store assembles on site | Lowest shipping cost, compact container loading |
| Semi-assembled | Main structure assembled, shelves and accessories separate | Easier in-store setup than flat-packed |
| Pre-assembled | Full display assembled at the factory | Ready to use — fastest in-store setup, highest shipping cost |
What the factory does:
- Applies glue to the designated tabs and joints using automatic folder-gluers or manual gluing stations.
- Folds the display along the crease lines and presses the glued joints to set.
- For pre-filled displays: loads products into the display, packs it into a master carton or wraps it for palletizing.
- Inspects each assembled display for glue quality, joint strength, and alignment.
What the buyer should verify:
- Confirm the assembly level matches the retail program (flat-packed is standard for most export; pre-assembled is common for club store pallet displays).
- Check that glued joints hold under light pressure — weak glue causes displays to collapse during store setup.
- Request an assembly instruction draft if the display will be assembled by store staff. Simple assembly reduces in-store labor costs and increases the chance the display is set up correctly.
- For pre-filled displays with multiple SKUs, confirm the product loading plan — which SKU goes on which shelf, how many units per shelf, and the loading direction.
Related: See our [[Retail-Ready Pallet Displays- What Club Store Buyers Expect|Retail-Ready Pallet Displays Guide]] for pre-filled assembly standards at club stores.
Step 8: Quality Control and Inspection
Quality control runs through the entire production process, but the final QC check before packing is the most important.
What the factory checks during QC:
| QC check | What is inspected | Acceptable standard |
|---|---|---|
| Material thickness | Board grade and thickness consistency | ±0.2 mm from specification |
| Print color and registration | Color accuracy, print alignment, PMS match | Visual match to approved sample |
| Die cut accuracy | Cut position relative to dieline | ±0.5 mm tolerance |
| Crease quality | Fold line depth and clean folding | No board cracking on fold |
| Glue joint strength | Bond strength at all glued joints | Joint holds under normal handling pressure |
| Assembly fit | All lock tabs engage, all joints meet | Display assembles correctly without forcing |
| Product fit test | Product fits in the designated space | Loads and unloads without resistance |
What the buyer should verify:
- Ask for QC photos or a video of the final inspection — this is standard for display factories but not all send it proactively.
- If the order is large (5,000+ units), request a mid-production inspection to catch issues before all units are produced.
- Confirm the factory's inspection standard before production — some factories check only print quality, while others check structure and fit as well.
Related: See our [[Display Fixture Structural Design Guide|Display Fixture Structural Design Guide]] for load testing and structural verification methods.
Step 9: Packing and Export Preparation
The final step is packing the displays for shipment. Packing method affects shipping cost, product protection, and in-store setup convenience.
Common packing methods:
| Packing method | Best for | Protection level | Container efficiency |
|---|---|---|---|
| Flat-packed in master cartons | Export shipments, large orders | High — each display is protected in a carton | Very good — stacked efficiently |
| Shrink-wrapped on pallets | Pre-filled displays, short domestic transport | Medium — wrap-only protection | Good |
| Knocked-down (KD) with edge protectors | Full pallet displays, bulk shipments | Medium-high | Very good — minimal air space |
| Pre-assembled on pallets with corner boards | Club store displays, retail-ready programs | High — full structural protection | Lower — assembled displays take more space |
Export packing details the factory should provide:
- Carton dimensions (length × width × height) per carton
- Gross weight per carton (display weight + carton weight + packing materials)
- Units per carton
- Cartons per pallet
- Pallet dimensions and weight
- Total volume per container (CBM)
- Shipping marks and handling instructions
What the buyer should verify:
- Confirm the packing method matches the shipping method — displays for sea freight need stronger packing than air freight.
- For export projects, verify that the factory provides all carton details, weights, and volumes before shipment.
- For pre-filled displays, check that the packed display is stable on the pallet and does not shift during handling.
Related: See our [[Display Fulfillment and Palletizing- What B2B Buyers Should Know About Co-Packing and Retail Logistics|Display Fulfillment and Palletizing Guide]] for export packing, container loading, and logistics coordination.
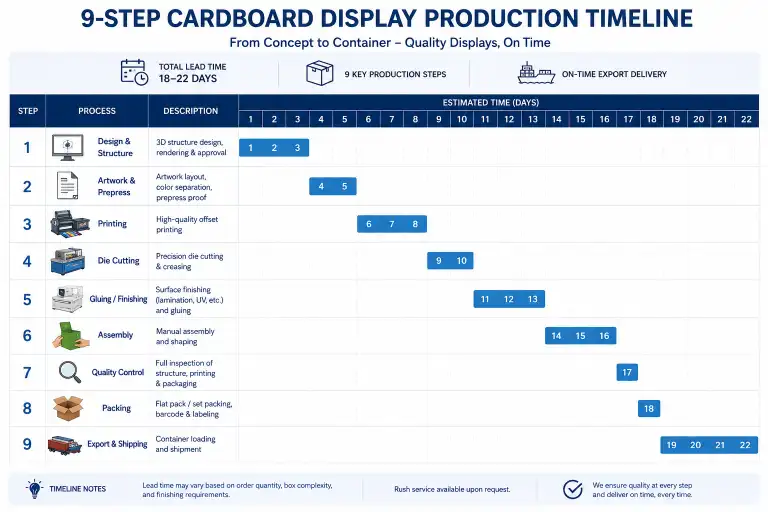
Production Timeline: How Long Each Step Takes
| Production step | Estimated time | Notes |
|---|---|---|
| Structural design and dieline | 1–3 days | Faster for standard structures |
| Blank sample making | 1–2 days | Often combined with design phase |
| Printed sample making | 2–4 days | Requires printing setup and plate/die preparation |
| Sample shipping to buyer | 3–7 days | Courier-dependent |
| Buyer sample approval | 1–5 days | Depends on buyer response time |
| Material procurement | 2–5 days | Board stock availability affects this |
| Die cutting and stripping | 1–3 days for 5,000 units | Depends on display complexity |
| Printing and finishing | 2–4 days | Flexo is faster than offset at volume |
| Folding, gluing, and assembly | 2–5 days | Pre-filled assembly takes longer |
| Quality control and packing | 1–2 days | Included in production time |
| Export documentation and loading | 1–2 days | Packing list, shipping marks, container loading |
Total typical lead time from approved sample: 10–15 working days for standard displays. Complex pallet displays with pre-filling and multiple SKUs may take 18–25 working days.
What Buyers Should Check at Each Stage
| Stage | What to check | Why it matters |
|---|---|---|
| Before production | Product dimensions, weight, SKU count, retail channel, launch date | These four inputs determine structure, board grade, and timeline |
| Dieline approval | Dieline matches product size, loading direction is correct | Changes after die cutting cost time and money |
| Blank sample | Product fits correctly, assembly works, dimensions are right | Cheapest time to fix fit issues |
| Printed sample | Color accuracy, print registration, finish appearance | Confirm brand color and visual quality |
| Mid-production (large orders) | Print consistency across sheets, die cut accuracy, glue quality | Catch issues before all units are made |
| Final QC | Packing quality, carton details, pallet stability | Confirm what will arrive at your warehouse |
| Shipment | Packing list matches order, carton marks are correct, photos confirm load | Avoid receiving discrepancies |
How a Factory Since 2008 Approaches Process Control
Leader Display has been manufacturing cardboard displays and paper packaging since 2008. Over years of export projects — serving brands, importers, and retail agencies in the US, Australia, the UK, and Europe — the production process has been refined around three principles that matter most to buyers:
1. Structural reliability comes before printing quality. A display that looks good but collapses in the store fails the entire program. Every structure is designed and tested for the product weight, stacking load, and transport conditions specific to the project. Board grade, joint method, and assembly logic are confirmed in the blank sample stage before printing begins.
2. Sample confirmation is the risk control point. The blank sample confirms fit and structure. The printed sample confirms color and finish. Neither can be skipped without introducing production risk. For first-time buyers, a sample run also reveals how the factory communicates, how fast they respond to revision requests, and whether the final production will match the approved sample.
3. Export packing is part of the design, not an afterthought. Carton size, pallet configuration, gross weight, and container utilization are considered at the design stage — not added after production. This approach reduces shipping cost, prevents transit damage, and provides the buyer with accurate shipping data for forwarder coordination from the first quotation.
These principles are supported by ISO 9001 quality management, Sedex audit compliance, and custom structural patents where applicable. For more on factory qualifications and what they mean for your project, see our [[Find a Reliable Cardboard Display Manufacturer in China|Guide to Finding a Reliable Cardboard Display Manufacturer]].
Conclusion
The cardboard display manufacturing process involves nine distinct steps, from structural design and material selection to die cutting, printing, assembly, quality control, and export packing. Each step affects the final product's quality, cost, and retail performance. Buyers who understand what happens at each stage can ask better questions, make faster decisions, and avoid the common problems that cause production delays — incorrect dieline, wrong board grade, off-register printing, weak glue joints, or insufficient packing for export shipping.
The most efficient path to a successful display program is: confirm the product dimensions and retail channel first, approve a blank sample before printing, and confirm the packing method before production. These three checkpoints eliminate most of the risk in a custom display project.
If you have a retail display project in development — whether a counter display, floor display, sidekick, or full pallet display — send us the product dimensions, target quantity, and retail channel. We will walk through the process from dieline to export packing and produce a sample you can verify before the bulk run.
FAQ
How long does it take to manufacture a cardboard display?
Standard cardboard displays take 10–15 working days from approved sample to shipment. Complex pallet displays with pre-filling and multiple SKUs take 18–25 working days.
What is the first step in cardboard display manufacturing?
The first step is structural design and engineering — the factory creates a 3D CAD model and dieline based on the product dimensions, weight, and retail display requirements.
What board grade is best for a cardboard display?
E-flute is best for lightweight counter displays and PDQ trays. B-flute is standard for floor displays and sidekicks. C-flute or double-wall is recommended for heavy products and pallet displays.
What is the difference between flexo, offset, and digital printing for displays?
Flexographic printing is cost-effective for large runs with simple graphics. Offset (litho) printing delivers the highest quality for fine detail and photographic images. Digital printing is best for short runs and rapid prototyping.
Do I need a sample before bulk production?
Yes. A blank sample confirms product fit and structure. A printed sample confirms color accuracy and print registration. Skipping samples is the most common cause of production errors in custom display projects.
What packing methods are used for export cardboard displays?
Flat-packed in master cartons is the most common export packing method. Pre-filled displays are typically shrink-wrapped on pallets. Full pallet displays may use knocked-down packing with edge protectors.
How do I choose the right board grade for my product?
The board grade depends on the product weight, display type, and shipping requirements. Light products on a counter display can use E-flute. Heavy products on a pallet display require C-flute or double-wall corrugated board.
What quality checks should I request from the factory?
Request QC checks for material thickness, print color and registration, die cut accuracy, crease quality, glue joint strength, assembly fit, and product fit test. For large orders, request mid-production inspection photos.