Starting a custom display project can feel overwhelming. Any misstep can lead to expensive errors and delays. But by following a clear, structured process, you can ensure great results.
To start a custom display project, first define clear goals and a budget. Then, focus on developing both the graphic and structural designs. Next, select the right materials, choose a reliable manufacturer, and approve a physical prototype before moving forward with full-scale production.

I've been in this industry for 16 years, and I've seen countless projects go from a simple idea to a successful in-store campaign. The difference between a smooth project and a stressful one always comes down to the planning at the very beginning. By breaking the process down into manageable steps, you can navigate it with confidence. Let's walk through those essential steps together, starting with the most important one: setting your foundation.
How do you define your project's goals and budget?
Having unclear goals will lead to confusing designs. This confusion ends up wasting both your time and your money. Defining your objectives first provides a solid foundation for everything else.
Define your goals by identifying your target audience1, the product it will hold, and the retail environment2. Then, set a realistic budget per unit3 based on your quantity. This clarity guides every decision you make, from the initial design to the final material selection.

This first step is the absolute foundation of your project. I remember a client who came to us wanting a "stunning" display but hadn't defined their budget or the product's weight. We spent weeks creating complex, exciting designs. But we later discovered they were far too expensive to produce and not strong enough to hold the product safely. We had to start from scratch. To avoid this, you have to get specific from day one. I suggest creating a simple project brief4. It doesn't need to be formal. It just needs to answer the critical questions for your internal team and your manufacturing partner. This turns a vague idea into a concrete, actionable plan.
Key Questions for Your Project Brief
| Question Category | Specifics to Define |
|---|---|
| Product Details | What are the exact dimensions and weight of the product? How many units go on the display? |
| Retailer Specs | Where will it be sold (e.g., Walmart, a small boutique)? Are there retailer-specific guidelines? |
| Project Goals | Is the main goal to build brand awareness, drive direct sales, or launch a new product? |
| Budget & Quantity | What is your target cost per display? How many total displays do you need to produce? |
Answering these questions upfront saves so much time and prevents stress later. It builds the roadmap everyone will follow.
What design and structural details should you consider?
Putting great graphics on a weak display is a recipe for failure. Likewise, a strong structure with a poor design won't sell your product. You need both to work together for real impact.
You must consider both graphic and structural design. For graphics, focus on your brand identity and clear messaging. For the structure, prioritize product weight5, ease of assembly, and shipping efficiency. The best designs perfectly balance visual appeal6 with practical, real-world functionality.

I work with talented designers like Peter all the time, and they create amazing graphics. But it's easy to forget about the physics involved. A cardboard display is a small piece of engineering. You have to think about how it will hold up in a busy store environment. I always advise my clients to consider the display's entire lifecycle. How will it ship from our factory to your warehouse, and then to the store? Can a busy store employee assemble it in less than five minutes? Will it survive a bump from a shopping cart?
Balancing Key Design Elements
Here’s how I break it down for my team and clients to ensure we cover all the bases:
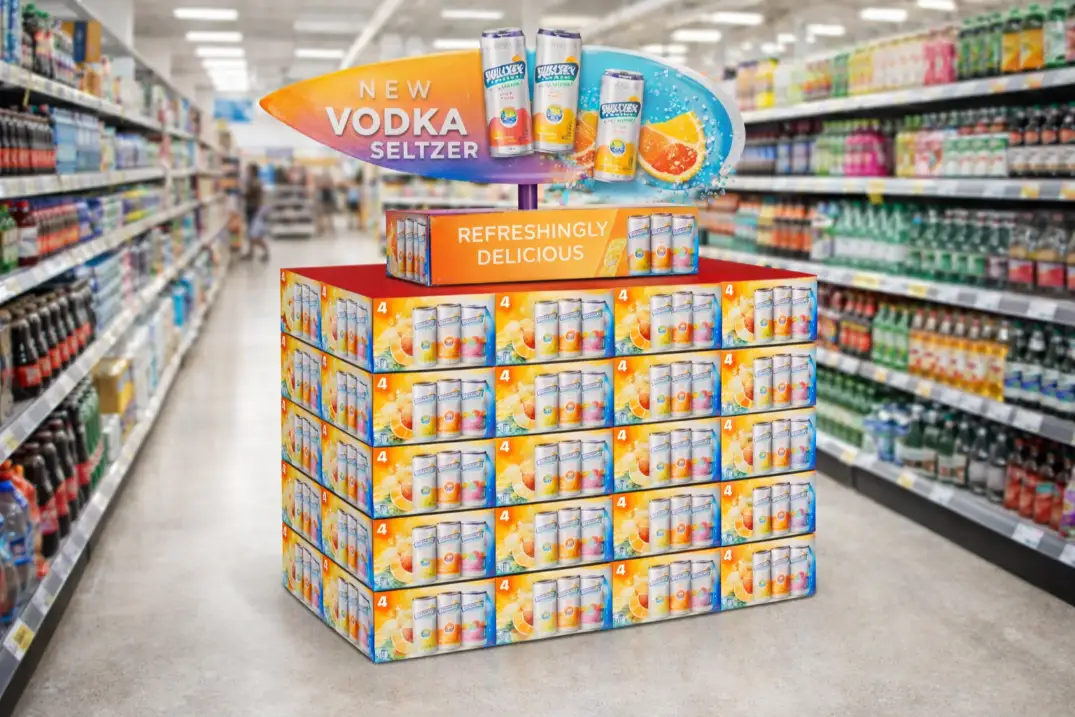
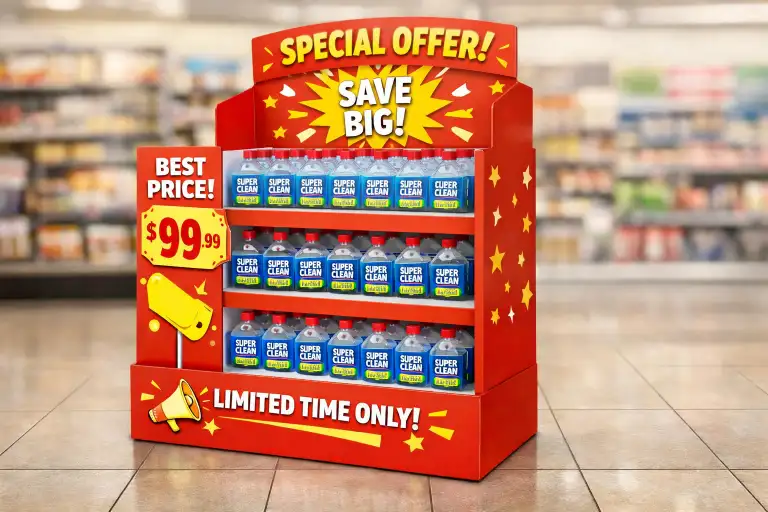
- Visual Impact: This is your branding, your colors, and your call-to-action. It's what grabs a customer's attention from across the aisle. We recommend using high-resolution images7 and keeping text minimal but bold.
- Structural Integrity: This part is non-negotiable. We use software to test stress points8 to ensure the cardboard grade can handle the required load. Corrugated B-flute is a versatile choice for its strength, but we might use a stronger EB-flute for holding heavier items like drinks or hardware.
- User Experience: This includes both the customer and the store staff. The product should be easy for a shopper to grab. The display must also be simple for a store employee to set up. Complicated displays often get left in the back room and never make it onto the sales floor.
How do you choose the right materials and manufacturer?
Choosing the wrong material can make your display flimsy and cheap-looking. Partnering with the wrong manufacturer can jeopardize your entire project. These decisions are critical to your success.
Choose materials based on your needs for strength, print quality, and budget. Common choices include different grades of corrugated cardboard. Select a manufacturer with proven experience in your product category, transparent communication, and solid quality control processes9. Always ask for samples of their work.

This is where my 16 years of experience really comes into play for my clients. The material is everything. You're not just buying a printed design; you're buying a physical product that needs to perform under pressure. For instance, a small countertop display for cosmetics might only need a thin, single-wall C-flute board. But a large floor display for heavy beverage bottles needs a much stronger double-wall board or even specially designed internal supports. A good partner will guide you to the right choice, not just the cheapest one.
Material & Partner Selection Checklist
When you're evaluating your options, think about these important points:
| Aspect | Key Consideration | Why it Matters |
|---|---|---|
| Material Quality | Ask for physical material samples (e.g., K9, A9, B9 corrugated). | You need to feel the difference in stiffness and print surface quality. |
| Relevant Experience | Does the manufacturer have a portfolio with projects similar to yours? | They will already understand the specific challenges of your product type. |
| Clear Communication | Are they responsive to your emails? Do they ask clarifying questions? | Good communication prevents misunderstandings and costly production errors. |
| Quality Control | Ask about their process for checking quality during the production run. | This ensures every single unit meets your standards, not just the prototype you approve. |
I always tell new clients to treat choosing a manufacturer like hiring an important employee. You need to trust them to represent your brand well. Don't just look at the price tag; look at the value and expertise they bring to your project.
What happens during the prototype and production phase?
Getting your first prototype is exciting. But a mistake found at this stage can be multiplied a thousand times in production. Careful review and approval are essential before you give the green light.
First, get a structural prototype, which is usually a white, unprinted sample, to test its fit and function. After approving that, you get a fully printed digital prototype to check colors and graphics. Only after you approve both samples should you authorize mass production.

This phase is all about verification. It is your final opportunity to catch any issues before it becomes a very expensive problem. I learned this lesson the hard way early in my career. We rushed a project to mass production based on digital proofs alone. When the thousands of displays arrived, the main brand color was slightly off from the client's official guide. It was a huge mistake that required a full reprint, costing us time and money. Now, I never, ever skip the full, two-stage prototype process10.
The Two-Stage Prototype Process
Here's why we always insist on a two-step approval before pressing the big green button:
- The Structural Sample: This is a plain, unprinted version of your display, cut by a plotter. You'll receive it flat-packed. Your job is to assemble it and test it with your actual product. Does it assemble easily? Is it sturdy enough? Does your product fit perfectly? This step confirms the engineering is sound.
- The Printed Sample: Once the structure is approved, we create a fully printed, assembled sample using a digital printer. Here, you check brand colors, look for typos, and confirm image quality. This is your "what you see is what you get" check. It needs to be perfect.
Only when you sign off on both of these prototypes do we start creating the printing plates and cutting dies for the main production run. It might seem like an extra step, but it has saved my clients thousands of dollars and countless headaches over the years.
Conclusion
Starting a custom display project11 is straightforward with a clear plan. Define goals, focus on design, choose partners wisely, and verify prototypes to ensure a successful product launch.
-
Understanding your target audience is key to creating effective displays. ↩
-
Explore how the retail environment impacts display design and effectiveness. ↩
-
Learn how to set a realistic budget that aligns with your project goals. ↩
-
A well-crafted project brief can streamline your display project and prevent confusion. ↩
-
Understanding product weight is essential for creating safe and effective displays. ↩
-
Learn techniques to make your display visually appealing and attention-grabbing. ↩
-
Discover the impact of high-resolution images on the effectiveness of your display. ↩
-
Learn about testing stress points to ensure your display can handle its load. ↩
-
Explore quality control processes that can prevent production errors. ↩
-
Understanding this process can save you time and money in production. ↩
-
Explore this resource to learn essential steps for a successful custom display project. ↩