A buyer emails three factories with the same product specification. Factory A responds in 2 hours with a quote and says the sample takes 3 days. Factory B responds in 3 days with a quote and says the sample takes 7 days. Factory C asks for product photos and says they need to check the design. The buyer goes with Factory A because they are fast and cheap.
The sample arrives. The product does not fit. The colors are wrong. The dieline is different from what was discussed. The buyer asks for a revision. Factory A sends another sample in 3 days. It still does not fit. The timeline is now 2 weeks behind schedule. The retail launch date has not moved.
The problem was not Factory A. The problem was that the buyer did not understand what happens at each stage of the sampling process — and did not know the right questions to ask before the first sample was cut.
This guide covers the sampling process step by step: what each sample type is for, what it costs, how long it takes, what information the factory needs from you at each stage, and how to avoid the most common sampling mistakes that delay retail launches.
01 Why the Sampling Process Matters
The sampling process is the only point in a display project where you can catch problems before they become expensive. A problem found at the blank sample stage costs a dieline revision and a few sheets of board. A problem found at mass production costs a full container of scrap, an emergency air-freight order, or a missed retail launch date.
The sampling process serves three purposes:
- Fit verification — Does the product actually fit in the display?
- Structural validation — Does the display hold the weight without collapsing?
- Print confirmation — Are colors, graphics, and text correct?
Each purpose has a specific sample stage. Skipping any one stage increases risk.
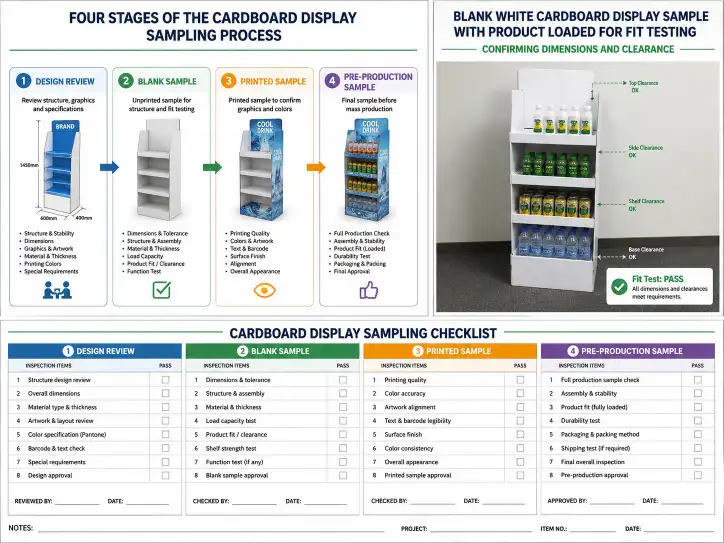
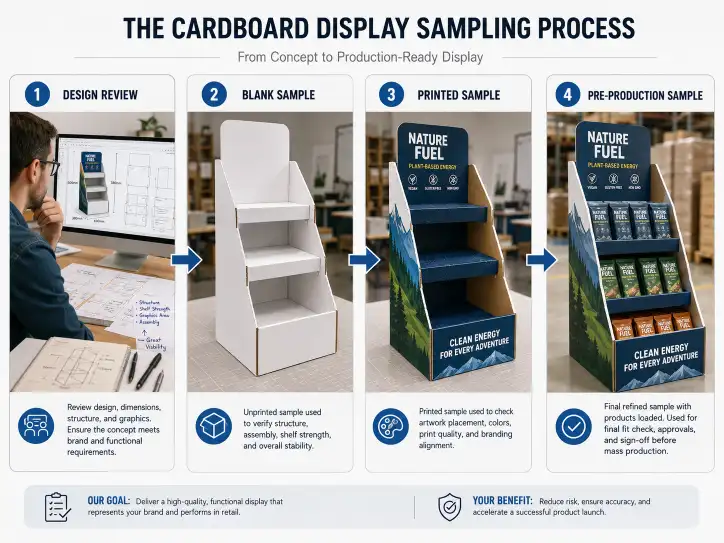
02 The Four Sample Stages
Stage 1: Structural Dieline Review (Before Any Sample)
What happens: The factory sends a 2D CAD drawing or dieline for review. This is not a physical sample — it is a flat layout showing where folds, cuts, and glue points are positioned.
Why it matters: The dieline determines everything that follows. If the dieline dimensions are wrong, every subsequent sample will also be wrong. Reviewing the dieline before cutting any physical board saves time and material.
What to check:
| Check Item | What to Confirm |
|---|---|
| Overall dimensions | Width, depth, height match your product and shelf specs |
| Product opening size | Product fits through the opening with 2–5 mm clearance |
| Shelf positions | Shelf heights match your product's vertical clearance needs |
| Fold direction | All creases fold the correct way (score vs crease) |
| Glue flaps | Glue areas are in the correct positions and not visible after assembly |
| Locking mechanism | Tabs and slots align properly |
Typical timing: 1–2 days after design confirmation
Cost: Free (included in the sample fee)
Risk if skipped: Physical samples arrive with wrong dimensions, requiring full re-cutting
Key rule:
Never approve a factory to cut a physical sample before you have reviewed and approved the dieline. A factory that cuts before dieline approval is a factory that wastes your time and money.
Stage 2: Blank Sample (White Sample)
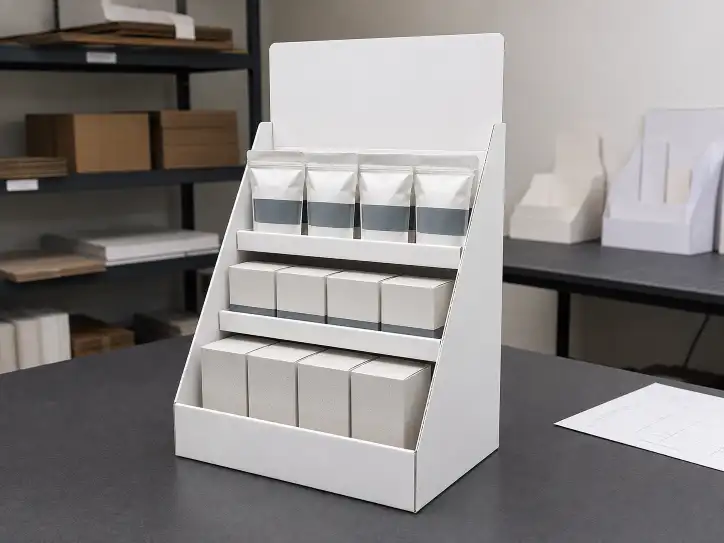
What happens: The factory cuts and assembles a sample using plain (unprinted) corrugated board. The blank sample uses the same board grade, flute type, and structure as the production version, but without any printing.
Why it matters: The blank sample is the first physical version of your display. It answers the critical question: does the product actually fit? It also confirms the assembly process, structural integrity, and board grade before any money is spent on printing.
What to check:
| Check Item | What to Confirm |
|---|---|
| Product fit | Place actual product in every position. Product should slide in easily but not rattle |
| Assembly time | Time how long it takes to assemble. If it takes more than 2–3 minutes for a simple PDQ or 5–8 minutes for a floor display, the design may be too complex for store staff |
| Joint strength | Tug at glue joints and lock tabs. They should hold without excessive force |
| Board grade | Confirm the board grade matches the specification. Measure flute thickness with calipers |
| Flat-pack dimensions | If shipping flat, measure the flat-packed dimensions for freight calculation |
| Weight | Weigh the sample. Compare to the specified board weight |
Typical timing: 3–5 days after dieline approval
Cost: $50–$200 per sample (usually deducted from the sample fee, sometimes free for first revision)
Risk if skipped: Product does not fit, but the error is only discovered after printing
Key rule:
Test the blank sample with your actual product, not with a similar-sized box. Products vary in shape, surface friction, and how they sit on a shelf. A box that is the same size as your product is not the same as your product.
Stage 3: Printed Sample (Color Proof)
What happens: The factory produces a sample with full printing using the specified print method (digital, litho-laminate, or flexo). This sample confirms color accuracy, print registration, and artwork placement.
Why it matters: Color on screen and color on corrugated board are never identical. A printed sample is the only way to confirm that your brand colors, text, and graphics look correct on the actual display material.
What to check:
| Check Item | What to Confirm |
|---|---|
| Color accuracy | Compare to brand color standards (Pantone references). Check under retail lighting conditions (fluorescent, not office LED) |
| Print registration | Check that all colors are aligned within 0.5 mm tolerance. Misregistration is most visible at text edges |
| Text readability | All copy must be legible at reading distance. Check font size, contrast, and position |
| Barcode scannability | If the display has a barcode, have it scanned to confirm readability |
| Artwork position | Confirm graphics are centered and aligned with the dieline. Graphics that shift 2 mm on a flat sheet can shift 10 mm after folding |
| Lamination consistency | For litho-laminate samples, check that the laminate is bonded evenly with no bubbles or peeling at folds |
| Finish quality | Check for scratches, ink smears, or dust spots (most visible on dark backgrounds) |
Typical timing: 5–10 days after blank sample approval
Cost: $100–$500 per sample (higher for litho-laminate due to mounting and laminating labor)
Risk if skipped: Mass production prints incorrect colors, and the entire batch must be reprinted
Key rule:
Always check the printed sample under the lighting conditions of the retail environment where the display will be used. A sample that looks perfect in a factory office under cool white LEDs may look washed out in a grocery store under warm fluorescent lighting.
Stage 4: Pre-Production Sample (Gold Sample)
What happens: The factory produces one or more samples using the exact same materials, printing, and assembly method as the mass production run. The pre-production sample is the final confirmation before bulk production begins.
Why it matters: The pre-production sample is the buyer's last opportunity to catch any issues before production. Once this sample is signed off, the factory proceeds to mass production. Any changes after sign-off require a new sample and a new approval cycle.
What to check:
| Check Item | What to Confirm |
|---|---|
| All items from Stage 2 and 3 reconfirmed | Nothing changed between the approved blank sample and printed sample on the final version |
| Product loading | Load the display with full production quantity. Confirm stability, accessibility, and visual presentation |
| Display stability | Apply lateral pressure at the top. The display should not tip over |
| Assembly instructions | If store assembly is required, confirm the instructions are clear and included in the packaging |
| Packing method | Confirm how the display is packed for shipment (flat, semi-assembled, pre-filled) |
| Labels | Confirm product labels, barcodes, and compliance labels are correct and applied correctly |
Typical timing: 7–14 days after printed sample approval
Cost: $200–$800 per sample (often applies toward total order value if production follows)
Risk if skipped: Mass production proceeds with an unverified final design, and errors are discovered after all units are produced
Key rule:
The pre-production sample is the legal baseline for your production order. If the mass production units differ from the pre-production sample, you have grounds to request a reprint or correction. Store the signed-off pre-production sample in a safe place until the order is delivered and inspected.
03 Sampling Timeline
A standard sampling cycle takes 2–4 weeks from dieline review to pre-production sample approval. Here is the typical timeline:
| Stage | Duration | Cumulative |
|---|---|---|
| Dieline review | 1–2 days | Day 1–2 |
| Blank sample (cut + ship) | 3–5 days | Day 4–7 |
| Buyer review + feedback | 1–3 days | Day 5–10 |
| Blank sample revision (if needed) | 2–3 days | Day 7–13 |
| Printed sample (print + laminate + ship) | 5–10 days | Day 12–23 |
| Buyer review + feedback | 1–3 days | Day 13–26 |
| Pre-production sample | 7–14 days | Day 20–40 |
Total typical range: 15–30 days for simple displays with no revisions, 30–45 days for complex displays with revisions
How to shorten the timeline
- Approve dieline within 24 hours — This is the fastest way to save 3–5 days
- Request blank and printed sample in parallel — Some factories will start print preparation while the blank sample is in transit, but only do this if the design risk is low
- Use courier shipping for samples — DHL or FedEx (3–5 days) vs sea freight (20–30 days)
- Limit revision cycles — Each revision adds 5–10 days. Aim for no more than 2 revision rounds
For a detailed guide on production lead times from dieline to shipment, see [[Cardboard Display Lead Time- Production Timeline Explained|Cardboard Display Lead Time: Production Timeline Explained]].
04 What Each Sample Stage Costs
Sample costs vary by factory and complexity. The typical range:
| Sample Type | Typical Cost | Who Pays | Applied to Production? |
|---|---|---|---|
| Dieline | Free | Factory | — |
| Blank sample (1–2 pcs) | $50–$200 | Buyer | Usually not |
| Blank sample revision | $30–$100 | Factory (if design error) or buyer (if spec change) | — |
| Printed sample (1–2 pcs) | $100–$500 | Buyer | Sometimes (50% of factories) |
| Printed sample revision | $80–$300 | Buyer | Usually not |
| Pre-production sample | $200–$800 | Buyer | Often (subtracted from invoice) |
What to negotiate
- First blank sample — Most factories provide the first blank sample free or at a nominal cost
- Sample fee deduction — Ask if the sample fee is deducted from the production invoice. Many factories deduct 50–100% of the sample fee if you place the production order
- Revision cost — Clarify upfront: if the revision is needed because of a factory error (wrong dieline, wrong board grade), the factory should cover the revision cost. If the revision is due to a buyer specification change, the buyer pays
For a full checklist of what to inspect when the pre-production sample arrives, see [[Cardboard Display Sample Approval Checklist- What to Check Before Mass Production|Cardboard Display Sample Approval Checklist]].
05 Common Sampling Mistakes
Mistake 1: Skipping the blank sample
A buyer approves a printed sample without seeing a blank sample because the timeline is tight. The printed sample looks great. When the production units arrive, the product does not fit — the display opening is 3 mm too small for the packaging. The factory points out that the dieline dimensions were approved, and the printed sample was approved. The buyer has no recourse.
Cost of mistake: 5–15% of the unit cost for re-cutting or scrapping
Prevention: Never approve a printed sample before confirming product fit on a blank sample. If the timeline is tight, ask the factory to send a photo or video of the blank sample with product loaded.
Mistake 2: Approving the sample without loading product
A buyer approves a blank sample by checking the dimensions on a workbench. The assembled display looks right. The factory confirms the dieline matches the spec. Production runs. When the displays arrive at the retailer, the store staff loads the product and the display tips over because the weight distribution is wrong — but the buyer never tested it with actual product.
Cost of mistake: Full display write-off plus chargebacks
Prevention: Always test the blank sample with actual product in every position. Load the display to full capacity. Then load it to half capacity and check stability.
Mistake 3: Approving print from a PDF, not a physical sample
A buyer is on a tight schedule and approves the print from a digital PDF proof. The factory runs production based on the PDF. The actual printed colors are 15% darker than the screen showed. The brand rejects the entire order.
Cost of mistake: Full reprint cost plus 3–4 weeks delay
Prevention: Never approve print without a physical printed sample. Monitor calibration between screen and printed output varies by +/−10–15% even on high-end monitors. A physical sample is the only reliable reference.
Mistake 4: Not checking the flat-packed sample
A buyer checks the assembled sample and approves it. The factory ships the displays flat-packed. The box dimensions for shipping are 20% larger than calculated because the display does not fold as flat as the CAD predicted. The freight cost increases by $1,500.
Cost of mistake: $1,000–$3,000 in extra freight
Prevention: Ask the factory to show you the flat-packed dimensions before you approve the sample. Confirm the pack quantity per carton and the carton weight.
For a detailed breakdown of display cost components including freight implications, see [[Cardboard Display Cost Breakdown - What Buyers Actually Pay For|Cardboard Display Cost Breakdown: What Buyers Actually Pay for Each Type]].
06 How to Manage Sampling Across Multiple Factories
If you are comparing three factories for the same project, here is a process that works:
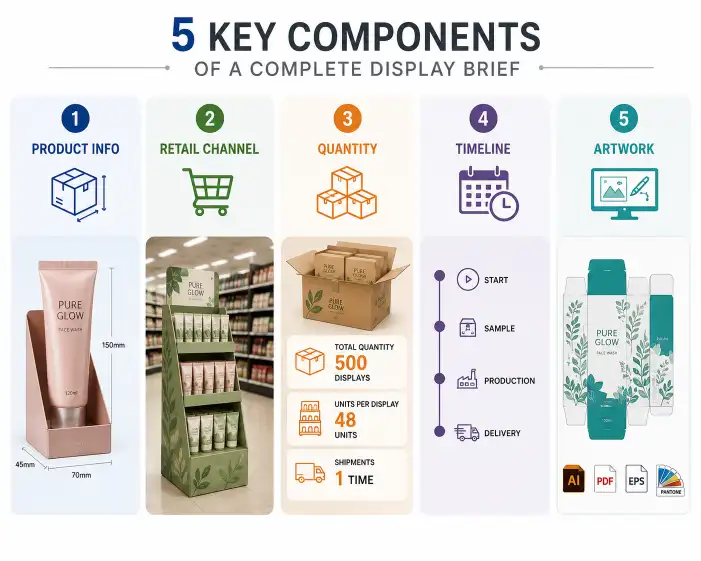
- Send the same spec package to all factories — Product weight, dimensions, SKU count, retailer, quantity, timeline
- Request dielines from each factory — Compare the dielines to see which factory understands the product requirements best
- Request a blank sample from the top 2 factories — Compare the blank samples side by side with your product. The sample that fits better, is easier to assemble, and uses the correct board grade reveals which factory has stronger engineering
- Request a printed sample from the best factory — Once you select the factory based on the blank sample comparison, proceed to printed sample and pre-production sample with that factory
This process ensures you evaluate each factory on structural capability before investing in printing, which is where the real sample costs are.
07 Sampling Checklist (Printable Summary)
Before any sample:
- Product weight and dimensions provided to factory
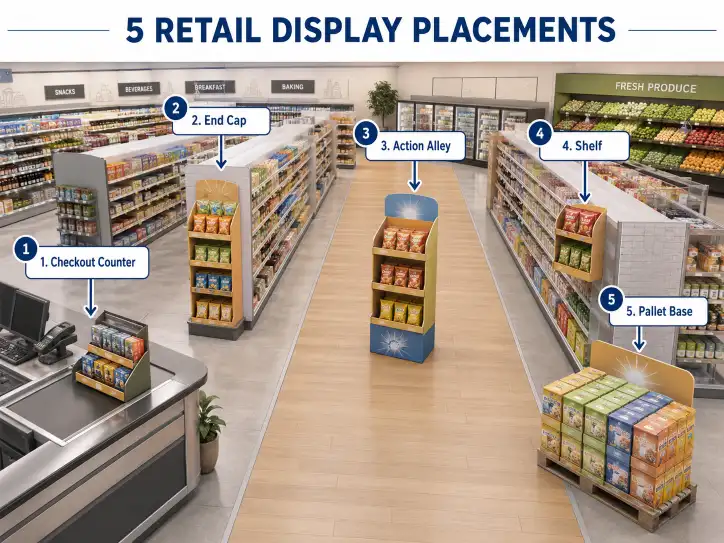
- Target retailer and display location confirmed
- Order quantity confirmed
- Artwork files ready (vector format, bleed included)
Dieline review:
- Overall dimensions correct
- Product opening size confirmed with 2–5 mm clearance
- Shelf positions match product height
- Fold directions correct
- Glue flaps positioned correctly
Blank sample:
- Product fits in every position
- Assembly time acceptable (2–5 min for simple displays)
- Joints and locks hold securely
- Board grade matches spec (measure flute thickness)
- Flat-pack dimensions measured
- Display weight recorded
Printed sample:
- Colors match brand standard (Pantone)
- Print registration within 0.5 mm
- All text readable
- Barcode scannable (if applicable)
- Laminate bonded evenly (if litho-laminate)
- No surface defects
Pre-production sample:
- All blank and printed checks reconfirmed
- Display stable at full load
- Display stable at half load
- Assembly instructions clear (if store assembly)
- Packing method and labels confirmed
Final approval:
- Pre-production sample signed off and dated
- Sample stored as baseline reference
- Production timeline confirmed