Need displays for your launch but worried about the timeline? Misjudging this can risk your campaign. I'll break down the schedule to help you plan with confidence.
A typical timeline for custom POP displays is 4 to 6 weeks from start to finish. This covers initial design, prototyping, revisions, mass production, and shipping. Simple designs are faster, while complex displays with special features can extend this timeframe. Clear communication is absolutely vital.
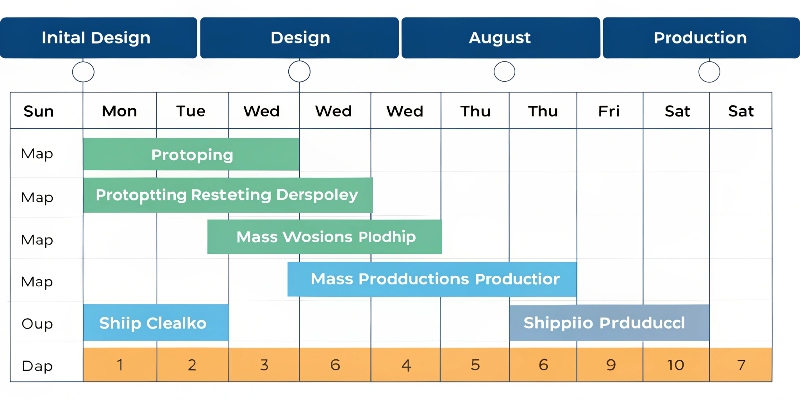
That 4-to-6-week window is a great starting point. But what really happens during that time? To really get a handle on your project timeline, you need to understand each step. Let's start at the beginning and break down what goes into the design and prototyping phase.
How Does the Design and Prototyping Phase Affect the Timeline?
Have a great display idea but unsure how to finalize the design? A messy design phase leads to delays and extra costs. A solid process ensures a strong start.
The design and prototyping phase1 usually takes 1 to 2 weeks. This critical stage sets the foundation for your project, finalizing the structure, graphics, and materials. A solid, approved prototype prevents costly errors later. Your quick feedback here makes a huge difference in staying on schedule.

This initial phase is where the magic really begins. It is not just about making something look good. It is about engineering a solution that works in the real world. Over my 16 years in this business, I’ve seen projects fly or fail right here at this stage.
From Idea to Digital Blueprint
It all starts with your brief. We discuss what you need the display to do. How many products will it hold? What do they weigh? Where will it be placed in the store? Based on this, my team creates a structural design2, which is a 'dieline3' or blueprint. This digital file shows exactly how the cardboard will be cut and folded. It ensures the display is strong enough and practical for assembly. For a simple counter display, this is quick. But for a complex floor display with multiple tiers or a unique shape, this structural engineering takes more time and expertise.
Bringing it to Life with a Prototype
Next, we create a physical sample. The first one is often a "white sample4" with no printing. You can put your products on it to test the fit and strength. Once you approve the structure, we create a full digital prototype with your graphics. This shows you exactly what the final display will look like. This is the moment of truth. Seeing the prototype helps you spot any issues before we make thousands of them. Reviewing and approving this sample quickly is vital to keeping the project moving.
| Stage | Typical Duration | Key Factor |
|---|---|---|
| Initial Briefing & Concept | 1-2 Days | Clarity of your requirements |
| Structural Design | 1-2 Days | Complexity of the display |
| Sample Making (White & Color) | 2-4 Days | Material availability |
| Client Revisions & Approval | 1-5 Days | Speed of your feedback |
What Factors Influence the Mass Production and Shipping Schedule?
Your prototype is approved, but the wait for mass production5 feels long. Delays here can make you miss your retail launch. Let's explore the factors that control this stage.
Mass production and shipping usually take 3 to 4 weeks. The key factors are your order quantity, display complexity6, and printing requirements. The final delivery time also depends heavily on the shipping distance and method you choose, whether it's by sea or by air.

Once you say "go" on the prototype, we move into the mass production5 stage. This part of the process is a well-oiled machine, but several things can affect its speed. I have learned that a good production plan7 is just as important as a good design.
The Manufacturing Workflow
First, we print the graphic sheets for your entire order using large-format offset or digital printers. After printing, we often add a laminate or varnish to protect the surface and enhance the look. Then, these printed sheets are glued onto the corrugated cardboard. Throughout this process, our team runs quality control checks8 to make sure colors are consistent and cuts are precise. The next step is die-cutting, where a large, custom-made tool stamps out the display shapes from the board. Finally, the pieces are glued, folded, and assembled if needed, before being carefully packed for shipment. A larger order or a more complex assembly process naturally adds more time.
Getting Your Displays to You
How the displays are packed and shipped is a major time factor. Most are shipped flat-packed to save space and reduce shipping costs. We include clear assembly instructions9. Shipping within the same country is usually fast. However, international shipping requires more planning. You must choose between speed and cost.
Here’s how the main shipping options compare:
| Shipping Method | Typical Transit Time | Cost Level | Best For |
|---|---|---|---|
| Sea Freight | 20-40 Days | Low | Large orders, not time-sensitive |
| Air Freight | 3-10 Days | High | Urgent orders, smaller quantities |
| Road/Rail | 1-7 Days | Medium | Domestic or regional shipping |
How Can You Help Speed Up the POP Display Production Process?
Have a tight deadline and need displays fast? The ticking clock can be stressful when you feel like you're just waiting. But you can actively help speed things up.
You can speed up the process significantly. Start with a clear, detailed brief. Provide fast, decisive feedback on the designs and prototype. And have your high-resolution graphic files10 ready. Your active participation and quick communication are the best ways to shorten the timeline.
While we work hard to be efficient, the timeline is a two-way street. Your involvement is crucial. Our smoothest, fastest projects always have one thing in common: a highly engaged and prepared client. I remember one client who needed displays for a huge trade show in just three weeks. They came to us in a panic. But they were incredibly prepared. They had their product specs, final artwork, and budget ready on our first call. They approved the design the same day and the prototype the next. Because they were so responsive, we rushed production and got the displays shipped with a day to spare. They are a perfect example of how you can be a true partner in hitting a tight deadline.
Be Prepared from Day One
The more information you give me upfront, the faster I can create a design that works. Before you contact us, try to have clear answers to key questions. What are the product's dimensions and weight? What is your budget per unit? Do you have the final, high-resolution artwork ready? Providing this information in our first conversation can shave days off the initial design phase. It avoids the back-and-forth of guessing.
Communication is Key
Once the process starts, speed is all about communication. When we send a design or prototype photo, try to give feedback within 24 hours. Consolidate feedback from your team instead of sending multiple, conflicting emails. Designating one person on your team as the main point of contact also streamlines everything.
| Your Action Item | Impact on Timeline | Potential Time Saved |
|---|---|---|
| Provide a Complete Brief | Reduces initial design revisions | 2-3 Days |
| Have Print-Ready Artwork | Avoids graphic design delays | 1-3 Days |
| Give Fast, Clear Feedback | Shortens the prototype stage | 2-5 Days |
| Be Decisive on Approvals | Prevents project stalls and waiting | 1+ Days |
Conclusion
The 4 to 6-week timeline for POP displays is a partnership. Your clear brief, fast feedback, and decisive approvals are key to a smooth process and a successful launch.
-
Learn about the critical role of design and prototyping in ensuring timely production and successful outcomes. ↩
-
This link will provide insights into the importance of structural design in creating effective displays. ↩
-
Explore the concept of dielines and their importance in the display design process. ↩
-
Learn about the significance of white samples in testing display designs before production. ↩
-
Discover the key factors that can affect mass production timelines and how to manage them. ↩ ↩
-
Understanding display complexity can help you better plan your production schedule. ↩
-
Find out how a solid production plan can enhance efficiency and reduce delays. ↩
-
Discover the importance of quality control checks in ensuring the final product meets standards. ↩
-
Explore how clear assembly instructions can facilitate easier setup and customer satisfaction. ↩
-
Learn why having high-resolution graphics is crucial for the quality of your displays. ↩


