Struggling with a design process that feels chaotic and unpredictable? This confusion can lead to costly mistakes and displays that just don't work, hurting your brand's in-store performance.
The process for designing a custom retail display involves five key stages: consultation and briefing, conceptual design and brainstorming, detailed design and engineering, prototyping and testing, and finally, production and logistics. This structured approach ensures the final display perfectly meets your brand, product, and retail needs.

I've been in this industry for 16 years, and I can tell you that a solid process is everything. It's the difference between a display that flies off the shelves and one that gathers dust. Many brands and even some designers think it's just about making something look good, but there’s so much more to it. The real magic happens when you follow a clear path from a simple idea to a fully realized display standing in a busy store. A well-defined process removes guesswork, minimizes risk, and ensures everyone involved, from the client to the production team, is on the same page. Let's break down exactly what that path looks like so you can approach your next project with confidence.
How to design retail displays?
Are your products getting completely lost on those crowded store shelves? This lack of visibility means you're missing out on sales and failing to build a strong brand presence.
To design effective retail displays1, you must first understand your goals, your target customer2, and the retail environment3. Then, you focus on creating a design that is visually striking4, structurally sound5, and clearly communicates your brand message6. It's a mix of art, engineering, and marketing.

In my experience, the best display designs happen when creativity7 is balanced with real-world constraints. It's not just about what looks good on a computer screen; it's about what works in a physical store. We always start by focusing on three core areas to make sure the design is successful from every angle.
Balancing Creativity and Practicality
A design can be beautiful, but if it’s too expensive to produce or a nightmare for store staff to assemble, it's a failure. I remember a project early in my career where we designed a stunning, intricate display. It looked amazing, but the assembly time8 was over 30 minutes, and the cost was double the client's budget. We had to go back to the drawing board. Now, we always design with the budget, materials, and ease of assembly in mind from the very first sketch. Practicality is just as important as creativity7.
The Role of Brand Identity
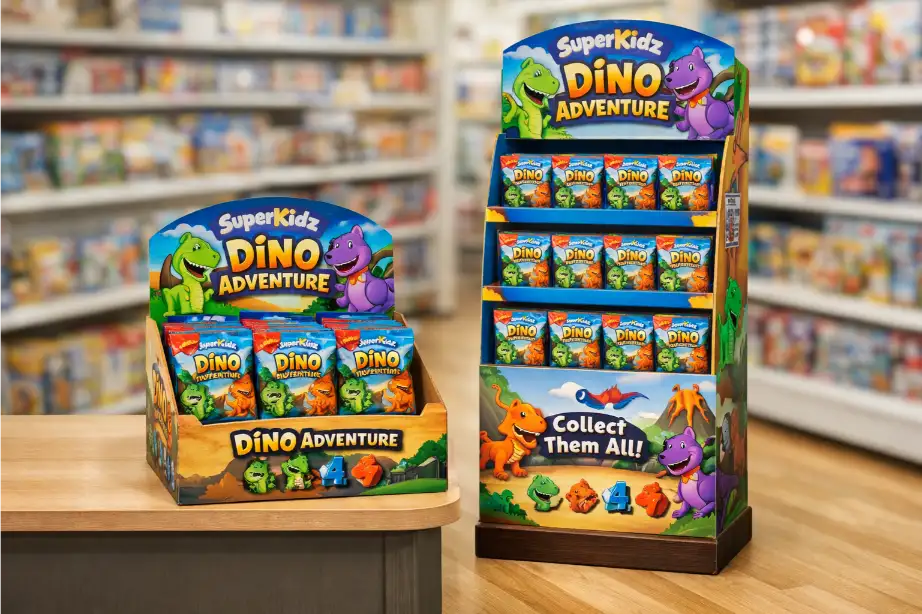
Your display is a physical representation of your brand. It needs to speak the same language as your packaging, website, and advertising. This means using your brand's colors, fonts, and logos consistently. The structure itself can even reflect your brand’s personality—is it sleek and modern, or rustic and natural? We make sure the brand's story is told at a glance.
| Brand Element | Display Application |
|---|---|
| Logo | Place prominently, often at the top. |
| Colors | Use primary brand colors for the main structure. |
| Fonts | Use official brand fonts for all text. |
| Imagery | Use lifestyle or product photos from the campaign. |
Thinking About the Shopper's Journey
We design for the person who will actually be buying the product. How will they see the display first? From the end of the aisle? What will they see when they get closer? The main message needs to be big and bold, while smaller details can be discovered up close. Most importantly, the design must make it incredibly easy for the shopper to grab the product. If it's hard to get the product out, you'll lose the sale.
What are the 5 steps to creating a display?
Does starting a custom display9 project feel completely overwhelming? If you miss a critical step along the way, it can create huge delays and expensive errors that sink your entire campaign.
The five essential steps are: 1. Briefing & Discovery10, 2. Ideation & Concept Design, 3. Structural & Graphic Design, 4. Prototyping & Approval11, and 5. Manufacturing & Delivery. Following this sequence ensures a smooth and successful project from start to finish.

After handling hundreds of projects, I've refined our process down to these five non-negotiable steps. Skipping or rushing any of them is a recipe for disaster. This isn't just a checklist; it's a roadmap that we follow to turn a client's vision into a high-performing retail tool. Each step builds on the last, ensuring that we catch any potential issues early and that the final product is exactly what our client needs. It’s a systematic approach that guarantees quality and predictability. Let’s look at what happens in each stage.
The 5-Step Design and Production Process
| Step | Key Activities | Goal |
|---|---|---|
| 1. Briefing | Client meeting, product analysis, budget/timeline review. | Understand all project requirements. |
| 2. Concept Design | Brainstorming, sketching, 2D renderings. | Visualize creative directions. |
| 3. Detailed Design | 3D CAD modeling, material specification, graphic application. | Create a production-ready blueprint. |
| 4. Prototyping | Creating a physical sample, product testing, client review. | Validate the design and get approval. |
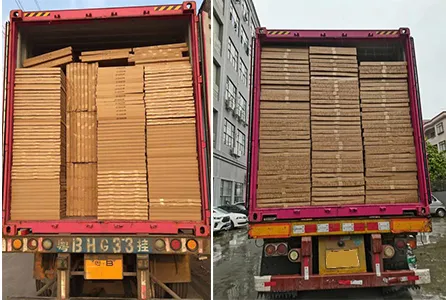
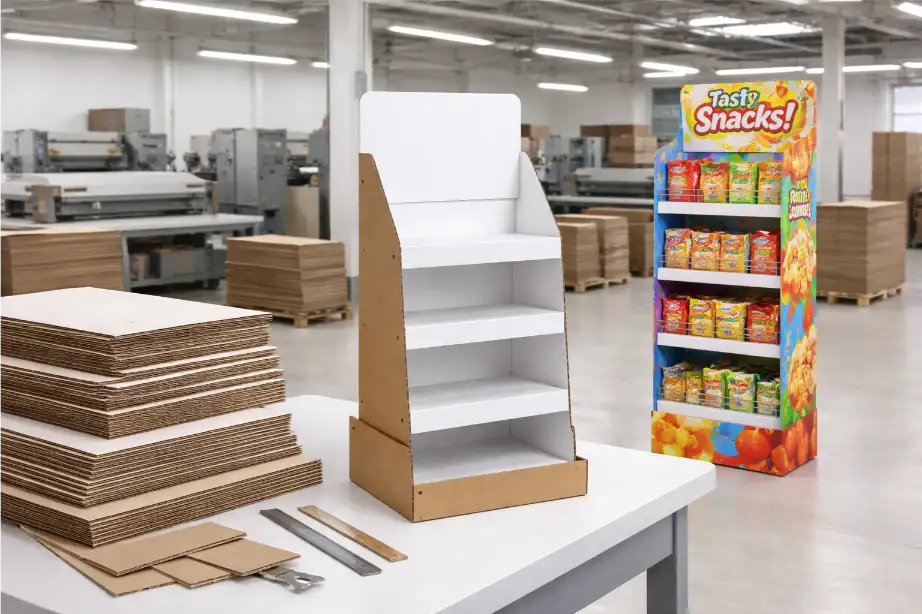
| 5. Production | Mass printing, die-cutting, assembly, packing, shipping. | Deliver the final displays on time. |
During the Briefing, we ask everything: product weight and dimensions, how many units the display needs to hold, which retailers it will be in, the budget, and the deadline. In the Concept Design stage, our designers get creative, providing a few different ideas. Once a direction is chosen, we move to Detailed Design, where our engineers create a precise 3D model, ensuring it's strong enough and easy to build. The most crucial step is Prototyping. We create a real, physical sample that the client can see, touch, and test with their products. Only after the prototype is approved do we begin Production, where we manufacture and ship the final displays.
What is creating display design?
Do you think display design is just about making a pretty stand for products? This mindset leads to displays that look nice but completely fail to actually sell anything in a competitive retail setting.
Creating display design is a strategic process combining graphic design12, industrial design, and marketing. It involves engineering a physical structure that holds and showcases products while also attracting customers, telling a brand's story, and ultimately driving sales13 in-store.

When I explain my job to people, I tell them I'm part artist, part engineer, and part marketer. A cardboard display is not just a container; it's a silent salesperson. It has about three seconds to grab a shopper's attention and convince them to take a closer look. So, the design process must go much deeper than just appearances. It's a calculated effort to influence shopper behavior and make the product the hero. We think about every detail, from the psychology of color14 to the physics of load-bearing structures15.
More Than Just Aesthetics
A great design uses psychology to its advantage. We use bright, contrasting colors to catch the eye from a distance. We use layout and graphic elements to guide the shopper's gaze directly to the product and the key selling points. The goal is to create an experience, not just a structure. It needs to interrupt the shopper's routine and make them curious enough to stop and engage with your brand.
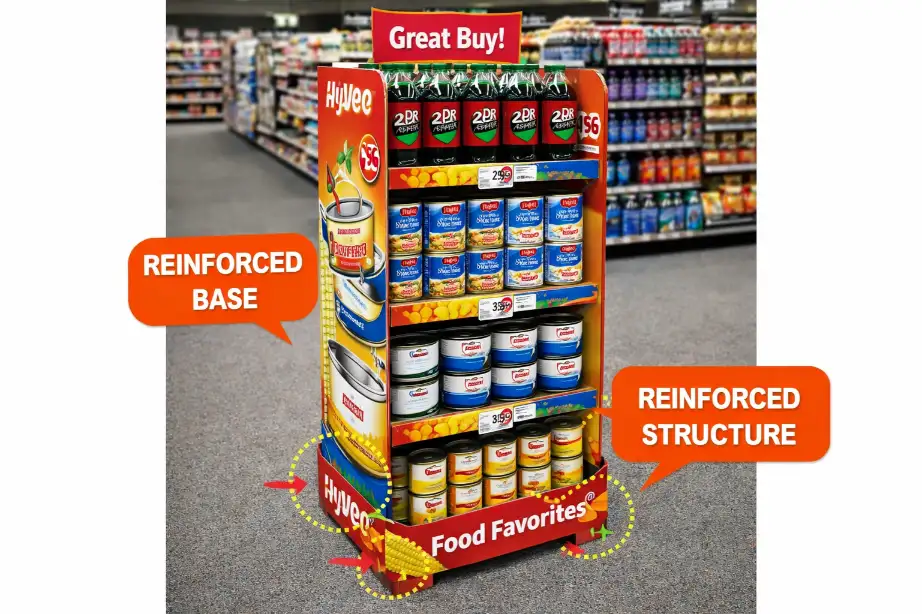
The Technical Side: Structural Integrity
This is where my 16 years of experience really come into play. A beautiful design is worthless if it collapses in the store. We perform detailed calculations to ensure the display can handle the weight of the products for the entire length of the campaign. We choose the right grade and thickness of cardboard based on the store environment. For example, a display in a humid region needs a different material than one in a dry one. We design for durability and stability above all else.
The Marketing Goal: Driving Sales
Every design decision is ultimately made to support one goal: increasing sales. Is the product easy to see and access? Can the shopper easily grab one without knocking others over? Does the key message—like "New!" or "50% Off"—stand out? I’ve seen displays that were so over-designed that the product itself got lost. A successful design makes the product the absolute star of the show.
What does "display custom" mean?
Are you wondering if you should get a generic stock display or a "custom" one? Choosing the wrong option can mean you end up with a poor fit for your product and a wasted budget.
"Display custom" means the display is designed and built from scratch to fit your specific product, brand, and marketing goals16. Unlike a one-size-fits-all stock display, every element—like the size, shape, graphics, and materials—is tailored for your unique needs to ensure maximum impact.

The word "custom" is key here. It signifies that we aren't pulling a pre-made design off a shelf. Instead, we are starting with a blank slate and building a solution around your product. A stock display is like buying a suit off the rack—it might work, but it probably won't fit perfectly. A custom display9 is like getting a tailored suit—it’s made just for you, highlighting your best features and presenting you in the best possible light. This tailored approach is essential when you want to stand out and make a real statement in a crowded retail space.
Tailored to Your Product
The most obvious benefit of a custom display9 is that it fits your product perfectly. We design pockets or shelves to the exact dimensions of your product, holding it securely and presenting it beautifully. With stock displays, products often slide around, sit awkwardly, or have too much empty space around them, which looks unprofessional and can even lead to damage. A perfect fit makes the product look more premium.
A Unique Brand Statement
A custom display9 is a canvas for your brand. You aren't limited to a simple rectangular box. We can create unique shapes17 and structures that reflect your brand's personality and capture shopper attention. I worked with a beverage company once to create a display shaped like their unique bottle. It stood out so much from the competition's standard shelving that their in-store sales doubled during the campaign. That's the power of a unique custom shape.
Custom vs. Stock Displays Comparison
| Feature | Custom Display | Stock Display |
|---|---|---|
| Product Fit | Perfect, secure fit for your product. | Generic fit, may be too big or small. |
| Branding | Fully branded with unique shapes17 and graphics. | Limited space for a logo or message. |
| Impact | Stands out and attracts attention. | Blends in with other displays. |
| Initial Cost | Higher due to design and tooling. | Lower, no setup/tooling costs. |
| Best For | Product launches, brand statements, high volume. | Small budgets, quick needs, testing. |
Conclusion
Ultimately, designing a custom retail display is a strategic process. It expertly blends creative design with practical engineering to create a solution tailored specifically to boost your brand and drive sales.
-
Explore effective strategies for creating impactful retail displays that attract customers. ↩
-
Understanding your target customer is crucial for effective marketing and display design. ↩
-
Explore how the retail environment impacts display effectiveness. ↩
-
Learn how to create visually appealing displays that capture shopper attention. ↩
-
Understand the importance of structural integrity in display design. ↩
-
Discover ways to effectively convey your brand's message through display design. ↩
-
Find insights on merging creative ideas with practical constraints in design. ↩ ↩
-
Explore tips for designing displays that are quick and easy to assemble. ↩
-
Explore the advantages of tailored displays for your specific needs. ↩ ↩ ↩ ↩
-
Understand the critical first steps in the design process for successful outcomes. ↩
-
Learn how prototyping helps validate designs before production. ↩
-
Discover how graphic design enhances the visual appeal of retail displays. ↩
-
Discover how effective display design can significantly boost sales. ↩
-
Learn how color influences shopper behavior and can enhance display effectiveness. ↩
-
Understand the importance of load-bearing calculations in display stability. ↩
-
Explore strategies for ensuring your display design supports your marketing objectives. ↩
-
Learn how unique shapes can make your display stand out in a crowded market. ↩ ↩

One Response