Your product gets lost in a crowded store. You've spent so much on development, but on the shelf, it's invisible. This directly hurts your bottom line and brand recognition.
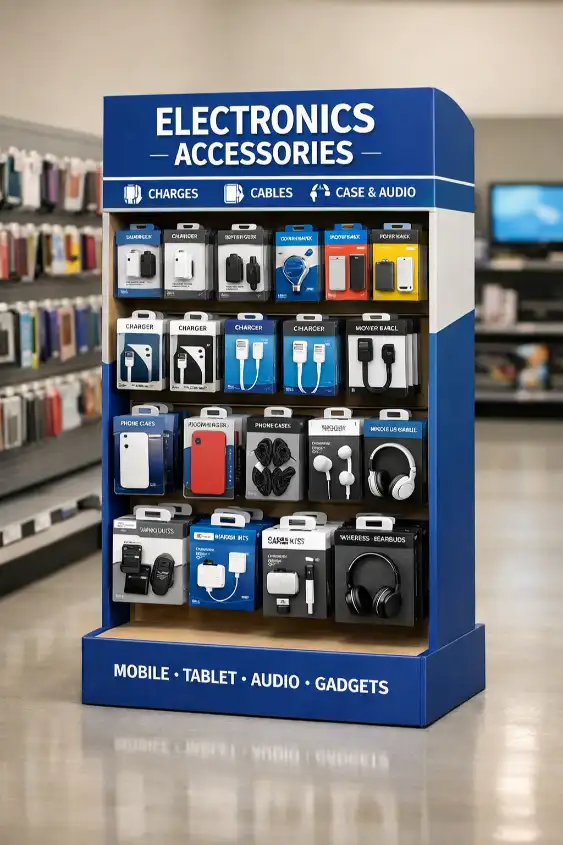
The key is to treat your display as a silent salesperson. An effective custom cardboard display starts by understanding your product's weight, the retail environment, and your target customer. Focus on a stable structure, bold graphics with a clear message, and making the product easy to grab.

I've been in this industry for 16 years, and I've seen amazing products fail simply because of poor presentation. A great product in a bad display is like a brilliant actor with no stage. On the other hand, a well-designed display can stop shoppers in their tracks and turn a casual glance into a definite sale. It’s not just about holding products; it’s about creating an experience and telling a story in a matter of seconds. Let's walk through the steps to create a display that doesn't just sit there, but actively works for you and sells your product.
How do I start the design process for a custom display?
Clients often provide a vague brief like "make it look good". This ambiguity leads to endless revisions and wasted time. A structured approach from the start prevents this frustration.
Begin with a comprehensive design brief. This document should answer key questions about your product, your target audience, your budget, and the specific retail store where it will be placed. Getting these details right at the start is the most important step for a successful project.

When a designer like Peter gets a project, the first thing we need is information. A weak brief is our biggest roadblock. Over my years helping clients, I've learned that a great display is born from a great brief. It’s not just about dimensions; it’s about the full picture. I always guide my clients to think through these critical points before we even start sketching.
The Essential Design Brief Checklist
A detailed brief bridges the gap between your vision and a manufacturable design. It ensures we solve the right problems.
| Question Category | Key Details to Provide | Why It Matters |
|---|---|---|
| Product Information | What are the product's dimensions and weight? How many units should the display hold? | This determines the structural requirements and material choices. An overloaded display will fail. |
| Retail Environment | Which store will it be in (e.g., Walmart, a small boutique)? Where in the store (e.g., endcap, checkout counter)? | Retailers have strict guidelines. This affects the display's footprint, height, and overall design. |
| Project Goals | Is the goal to launch a new product, clear old stock, or boost holiday sales? | The goal shapes the messaging and visual urgency. A "new arrival" display looks different from a "clearance" one. |
| Budget & Timeline | What is the cost per unit for the display? When do you need them delivered? | This guides material selection and production methods, ensuring the project is feasible. |
Thinking through these questions transforms a vague idea into a concrete plan, saving time and ensuring the final display does its job.
What materials are best for balancing cost and durability?
You worry your display will look cheap or collapse under your product's weight. But a premium material might destroy your budget. Finding the right balance is a common challenge.
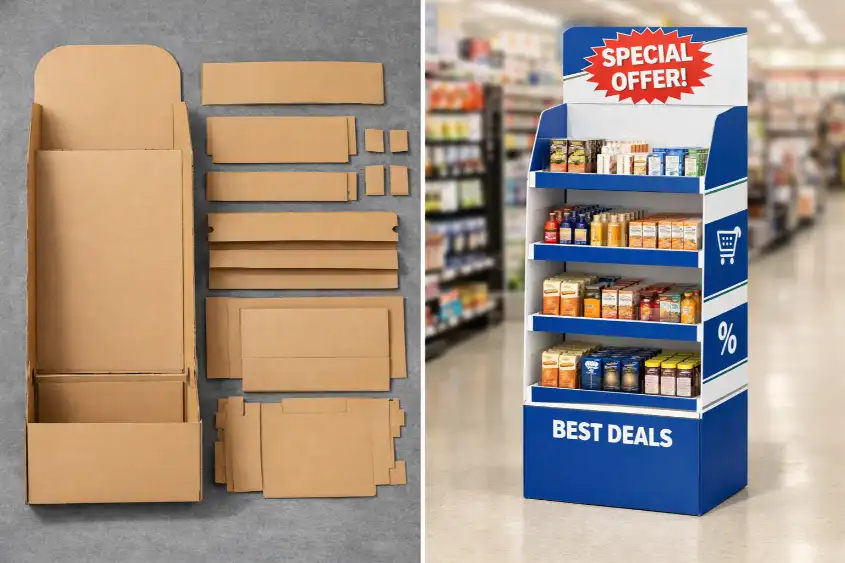
Corrugated cardboard is the best choice. Specifically, focus on the flute type. Use B-flute for great print quality and good strength for lighter items. Choose C-flute for general-purpose durability. For heavy products, a stronger BC-flute double wall is the safest and most cost-effective option.

I've seen clients choose the wrong material many times. Once, a client insisted on a thin board for a heavy beverage product to save a few cents. The displays started bending within a week in stores, and they had to replace them all. It cost them far more than if they had chosen the right material from the start. The secret isn't always a thicker board, but the right board. The structure of the cardboard itself, specifically the "flute," is where the magic happens.
Understanding Cardboard Flutes
The flute is the wavy layer of paper between the flat linerboards. Its shape and size determine the board's strength, printability, and cost.
-
B-Flute: This is a popular choice. It has a high number of flutes per foot, which creates a smooth surface.
- Pros: Excellent for printing high-resolution graphics. Good crush resistance.
- Cons: Not the strongest option for very heavy items.
- Best for: Counter displays, lighter product floor displays (e.g., cosmetics, snacks).
-
C-Flute: This is the most common, all-purpose flute. It offers a good mix of strength and cushioning.
- Pros: Great stacking strength and durability. Very common and cost-effective.
- Cons: The surface is a bit more ridged than B-flute, which can slightly affect fine print.
- Best for: Standard floor displays (PDQs), packaging for heavier items.
-
BC-Flute: This is a double-wall board, combining one layer of B-flute and one layer of C-flute.
- Pros: Extremely strong and durable. Can hold significant weight.
- Cons: Thicker, heavier, and more expensive. Printing requires more expertise.
- Best for: Pallet displays, displays for heavy items like beverages, hardware, or bulk goods.
Choosing the right flute is a technical decision that balances your budget with the physical demands of your product.
How can I make the graphics stand out without breaking the budget?
You want eye-catching graphics, but custom printing seems expensive and complex. You fear the final colors won't match your brand, making your product look unprofessional.
Focus on a simple, bold design with a clear hierarchy. Use flexographic printing for large runs with simple colors to keep costs low. For complex, photo-quality images on smaller runs, digital printing is your best option. Always ask for a printed proof to check colors before production.

Graphics are what catch a customer's eye from ten feet away. But busy, cluttered designs just create noise. I remember a client who wanted to put every product feature on their display. The result was an unreadable mess that shoppers ignored. We redesigned it with one strong headline, a hero image of the product in use, and a bold logo. Sales immediately improved. The lesson is that clarity is more powerful than clutter. And you can achieve that clarity with budget-friendly printing methods if you plan correctly.
Choosing the Right Printing Method
The choice between printing methods directly impacts your cost, quality, and production speed.
| Printing Method | Best For | Pros | Cons |
|---|---|---|---|
| Flexographic Printing | Large quantities (1000+ units) with limited, solid colors (e.g., logos, text). | Very low cost per unit at high volumes. Fast production speeds. | High initial setup cost for printing plates. Not ideal for photo-realistic images. |
| Digital Printing | Small to medium quantities, or designs with complex, full-color graphics. | No setup costs for plates. Perfect for photorealistic images and color gradients. Easy to change designs. | Higher cost per unit compared to flexo on large runs. Slower for very large quantities. |
| Litho-Lamination | Premium, high-end displays where graphic quality is the top priority. | The highest possible print quality, like a magazine. Produces a very smooth, professional finish. | The most expensive option. The process involves printing on paper then laminating it to the cardboard. |
Your choice depends on three things: your design complexity, your quantity, and your budget. For most projects I work on, digital printing offers the best flexibility and quality for the cost, especially for quantities under 1,000 units.
Why is prototyping so important before a full production run?
You've approved the design on a computer screen, and it looks perfect. Skipping the prototype step seems like a fast way to save time and money. But this is a huge gamble.
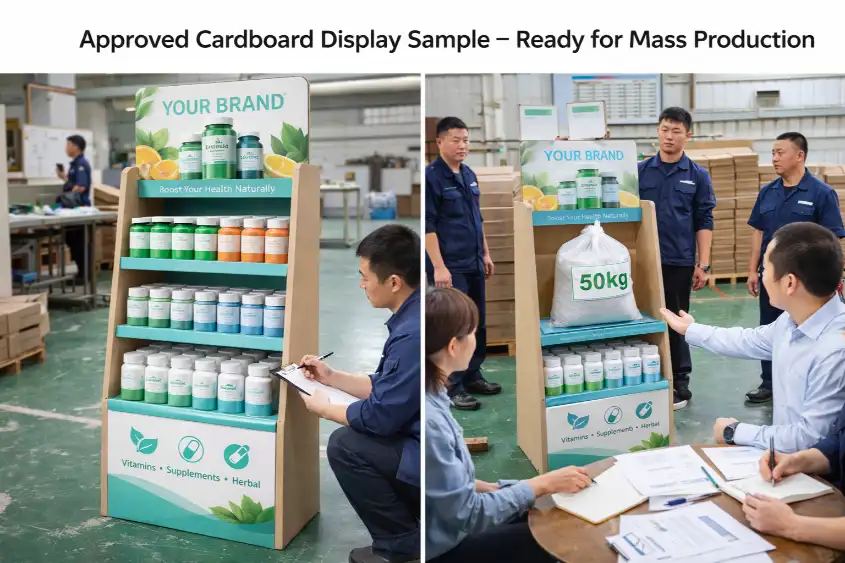
A prototype is your only chance to test the display in the real world. It allows you to check structural integrity with the actual product, verify the assembly process, and see how it looks in a real store environment before you commit to producing thousands of units.
![]()
A prototype isn't just a "sample"; it is a critical safety check. Years ago, I worked on a complex floor display. On the computer, the interlocking parts fit perfectly. We skipped the prototype to meet a tight deadline. When the first 500 units were produced, we discovered a tiny measurement error that made assembly a nightmare. It cost thousands of dollars and a week of delays to fix. Since that day, I never let a project go to production without a physical prototype. It’s the cheapest insurance policy you can buy.
The Prototype Testing Process
A successful prototype test should validate three key areas. This process helps us find and fix problems when they are cheap and easy to solve.
-
Structural and Load Testing:
- What to do: Assemble the prototype and load it with the exact product it will hold. Leave it for at least 24-48 hours. Push it, nudge it.
- What to look for: Does it lean, bend, or sag? Are any shelves or hooks showing signs of stress? Is it stable enough to withstand being bumped by a shopping cart? This is the most crucial test.
-
Assembly and Kitting Test:
- What to do: Have someone who has never seen the display try to assemble it using only the provided instructions. Time them.
- What to look for: Is the assembly process intuitive? Are the instructions clear? Can it be assembled quickly by store staff? If it's too complicated, it might never make it onto the sales floor.
-
Retail Environment Check:
- What to do: If possible, take the prototype to a friendly retail store. Place it in the intended location.
- What to look for: Does it fit in the designated space? Does the design clash with the store's environment? Do the graphics get lost in the visual noise of the aisle? This gives you a priceless real-world perspective.
A prototype might add a few days to your timeline, but it can save you from a disaster that could cost you weeks and your entire budget.
Conclusion
Creating a successful custom cardboard display is a planned process, not luck. By focusing on a clear brief, the right materials, smart graphics, and thorough prototyping, you build a powerful sales tool.