Unsure how to get an accurate quote for your custom display? Vague requests cause delays and confusion. I'll show you exactly what information to provide for a fast, precise quote.
To request a quote, provide detailed specifications: display type, dimensions, materials, quantity, and your product's weight and size. Include any artwork files or design ideas. The more information you give your supplier, the more accurate and faster your quote will be. This clarity helps avoid future misunderstandings.

Getting the right quote is the first step. But what questions should you be asking to make sure you're getting the best value? It's more than just price. I've spent 16 years in this business, and I've seen how a well-prepared request can make all the difference. Let's break down the process so you can approach any supplier with confidence and get exactly what you need for your product launch.
How do I ask for a quote for a product?
Asking for a quote seems simple, but missing one detail can cause major delays. You don't want endless email chains. I'll give you a clear checklist for your request.
When asking for a quote, be specific. State you need a "Request for Quotation (RFQ)1". Detail the product (e.g., cardboard floor display2), quantity, material specs (like flute type), printing needs, and your desired delivery date. Attaching a simple sketch or reference image helps immensely.

Key Information to Include
In my 16 years running Lddisplay, the best partnerships start with a clear request. When a designer like Peter sends a detailed RFQ, it saves us both hours of back-and-forth. It shows me they are serious and allows my team to get straight to the structural design and costing. A vague email asking "how much for a display?" is impossible to answer accurately. You need to provide the core details. I recommend structuring your request so that a manufacturer can understand your needs at a glance.
Why Details Matter
Every detail affects the final price and performance of the display. The material thickness3 changes the cost and strength. The print finish4 affects the look and durability. The quantity impacts the price per unit. When you provide all this information upfront, you get a quote you can actually rely on.
Here’s a simple table of what to include in your RFQ:
| RFQ Element | What to Provide | Example |
|---|---|---|
| Basic Info | Your company name, contact info | Lddisplay, Jason, jason@lddisplay.com |
| Display Type | Floor, counter, pallet, POP | Cardboard floor display with 4 shelves |
| Dimensions | Width x Depth x Height (overall & shelf) | 50cm W x 30cm D x 150cm H |
| Product Info | Product size, weight, quantity per shelf | 20 boxes of cereal, 500g each, 10 per shelf |
| Material | Cardboard type (e.g., B-flute), finish | B-flute corrugated, glossy lamination |
| Printing | CMYK, Pantone colors, artwork status | 4-color CMYK printing, artwork attached |
| Quantity | Number of displays needed | 500 units |
| Timeline | Desired delivery date | By October 30th |
How to create a retail display?
You have an amazing product, but how do you make it stand out in a store? A weak display will be invisible. I'll guide you through creating a display that grabs attention.
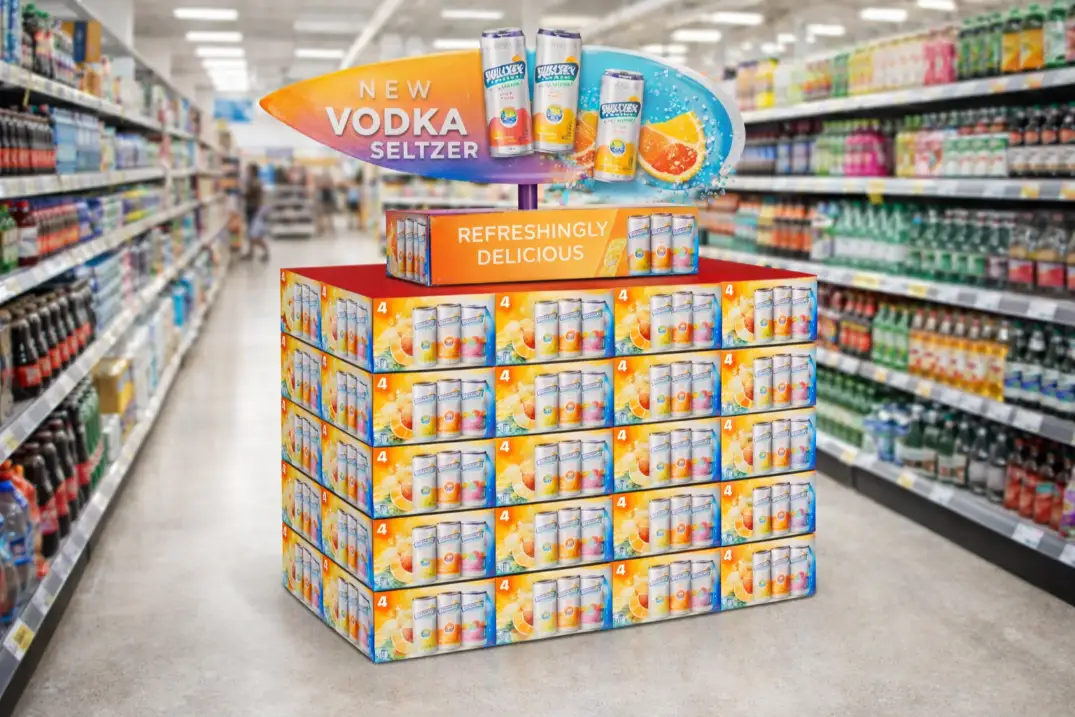
Creating a retail display involves defining your goal (e.g., boost sales, launch a product), understanding your target audience, and designing a structure that fits the retail environment5. Then, you focus on graphics that communicate your brand message and choose materials that are both durable and cost-effective.

The Design Brief
Everything starts with the "why." What is the main job of this display? Is it for a two-week promotion or for a six-month brand presence? Is it meant to educate the shopper or just drive an impulse buy6? I always ask my clients these questions first. The answers form the design brief7 and guide every decision that follows. For example, a short-term promotional display can use lighter, more affordable materials. A long-term display needs to be more robust. The goal also influences the graphics. A launch display might have more text to tell a story, while a sales display might just scream "50% Off!".
From Concept to Reality
Once we know the goal, we move to the concept. I encourage my designers to think about the shopper's journey8 past the display. Where will their eyes go first? How easy is it to take a product off the shelf? The design has to be both beautiful and functional. It’s a balance. We sketch ideas, create 3D mockups9, and consider the practical side. How will it ship? Will it be sent flat-packed to save on costs? How easy is it to assemble in the store? A display that looks stunning on a computer screen but is a nightmare to build is a failed design in my book.
Who sets up store displays?
Your beautiful new displays have been delivered to the stores. But who puts them together? Poor assembly can lead to collapse and lost sales. I'll explain the common setup scenarios.
Display setup is handled in a few ways. Often, the brand's own sales representatives or merchandisers assemble them during store visits. Sometimes, stores assign their own staff. For large, complex rollouts, brands may hire a third-party merchandising10 company to ensure consistency across all locations.

In-House vs. Third-Party Assembly
The choice of who builds the display depends on your resources and the scale of the campaign. If your own sales team is visiting stores regularly, they are a great option. They know the brand and can ensure the display is positioned perfectly. However, this can be slow and expensive for a nationwide launch. Store staff are another option, but they are often busy and may not have the training to assemble it correctly. For big campaigns, hiring a professional merchandising company is often the best choice. They specialize in this work and ensure your display looks exactly as you intended in every single store.
Designing for Easy Assembly
From my experience, the real solution is to design for easy assembly from the very beginning. I learned this lesson the hard way. Early in my career, I designed a very strong and complex display. The client loved the look, but their sales team hated building it. It took them 20 minutes per unit. Now, we design with the end-user in mind. The goal is always a tool-free, intuitive assembly in under five minutes. We provide simple, visual instruction sheets, or even QR codes linking to an assembly video. This saves everyone time and money and prevents frustration, no matter who is responsible for the setup.
| Assembly Method | Pros | Cons |
|---|---|---|
| Brand Reps | High brand knowledge, ensures proper setup | Costly, limited reach for large campaigns |
| Store Staff | Already on-site, no extra travel cost | May lack training, competing priorities |
| 3rd-Party Merchandisers | Professional, consistent, wide reach | Additional cost, requires coordination |
What are the 5 steps to creating a display?
Creating a display from nothing feels like a huge task. Skip a step, and your project can quickly go off track. Let me simplify it for you into five clear stages.
The five key steps are: 1) Define your objectives and budget. 2) Design the structure and graphics. 3) Create a prototype for testing. 4) Mass-produce the final displays. 5) Handle logistics, including shipping and in-store assembly. Following these steps ensures a smooth process.

From Idea to In-Store
This five-step process is the roadmap we use for every project at Lddisplay.
- Objective & Budget: First, we define success. What is the goal and how much can we spend?
- Design: Next, our creative team develops the structural and graphic design, making sure it meets the objective and is manufacturable within budget.
- Prototype: We then create a full-size, printed sample. This is the most critical step.
- Production: Once the prototype is approved, we move to mass production11, printing, cutting, and finishing the displays.
- Logistics: Finally, we manage the packing and shipping, whether it's bulk shipping to a warehouse or individual shipments to thousands of stores.
The Importance of Prototyping
I can't stress step three enough. Never, ever skip the prototype. On paper or on screen, a design can look perfect. But a physical prototype reveals the truth. I remember a client who was certain their product would fit perfectly. When we made the sample, we found the boxes tilted forward and were at risk of falling. A simple adjustment to the shelf angle at the prototype stage saved them from sending 1,000 faulty displays to stores. The prototype is not an extra cost; it's your project's insurance policy. It allows you to test the strength, check the print colors in real life, and even get feedback from a friendly retailer before you commit to the full run. It is a non-negotiable step for my team.
Conclusion
Getting a custom display is easy with a clear plan. Provide details, design with purpose, and plan for assembly. Your product will get the attention it deserves in any store.
-
Understanding RFQs can streamline your quoting process and ensure you get accurate estimates. ↩
-
Explore how cardboard floor displays can enhance your product visibility and sales. ↩
-
Learn about the importance of material thickness in display design for better durability. ↩
-
Discover how print finishes can impact the aesthetics and durability of your display. ↩
-
Tailoring your display to the retail environment can enhance visibility and sales. ↩
-
Learn strategies to design displays that encourage spontaneous purchases. ↩
-
A well-crafted design brief can guide your project and ensure alignment with your goals. ↩
-
Learn how to optimize your display for the best shopper experience and engagement. ↩
-
3D mockups can help visualize your design and make necessary adjustments before production. ↩
-
Explore how professionals can ensure your displays are set up correctly and consistently. ↩
-
Understanding the mass production process can help you plan your project timeline effectively. ↩