Struggling to find the right display for your product? The wrong choice can hurt your brand and sales. I'll show you the many custom options available to make your product shine.
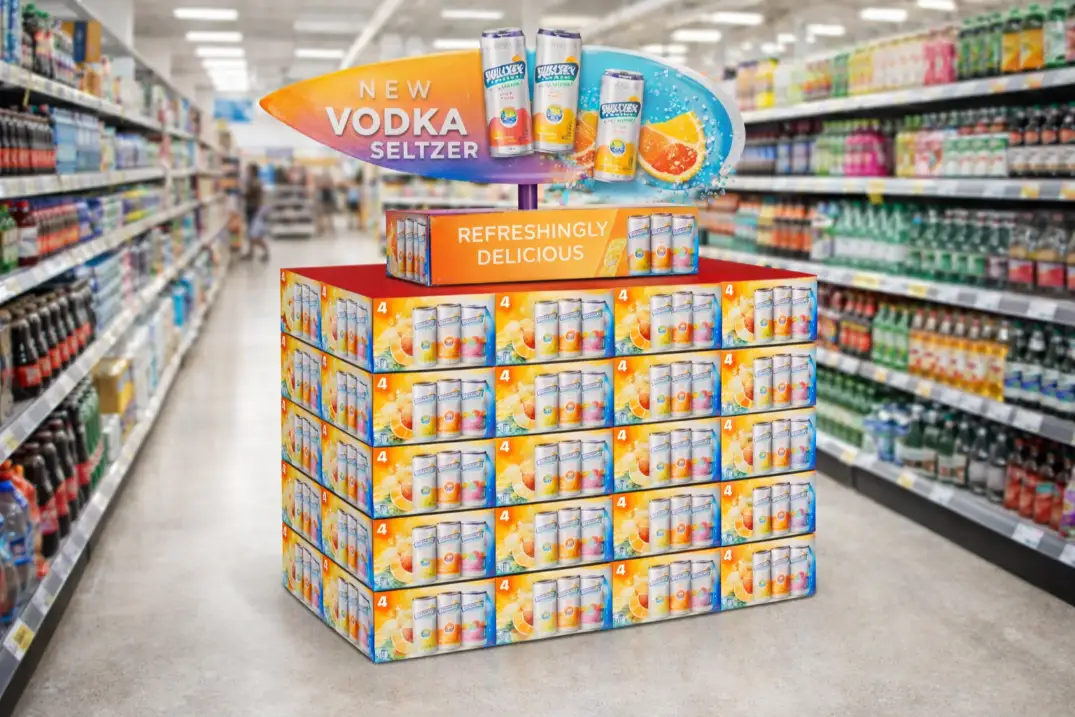
The main types of custom cardboard displays are floor displays, countertop displays, pallet displays, and POP displays. Each type serves a unique purpose, from launching new products in aisles to driving last-minute buys at the checkout counter. Choosing the right one depends on your product and goals.

Choosing the right display is a critical decision for your product's success in any retail space. After 16 years of designing and producing these solutions, I've seen firsthand how a great display can transform a campaign. It's about more than just holding products; it's about telling a story and grabbing a customer's attention.
To help you make a smart choice, let's break down the common questions I hear all the time. Understanding these basics will give you the confidence to select and budget for a display that truly works for your brand. This information is key to avoiding common mistakes and ensuring your investment pays off.
What are cardboard displays called?
Confused by all the different names for cardboard displays? Using the wrong term can lead to mistakes and confusion with your supplier. Let's clear up the common names and what they mean.
Cardboard displays are often called POP (Point of Purchase) displays, POS (Point of Sale) displays, or corrugated displays. The name usually depends on where they are used in a store, the material they're made from, or the function they serve to promote products.

In my experience, a little clarity on terminology goes a long way. I once had a client who kept asking for a "cardboard box stand." What they actually needed was a "corrugated floor display." The confusion nearly led to a design based on the wrong material strength. Once we straightened out the terms, the project went smoothly. The names matter because they communicate specific functions and locations within a store.
POP vs. POS vs. Corrugated
The terms can seem interchangeable, but they have distinct meanings. Understanding them helps you and your designer get on the same page faster.
- POP (Point of Purchase1): This refers to any display placed where a customer is making a buying decision, like in a store aisle. Think of a large floor display promoting a new snack.
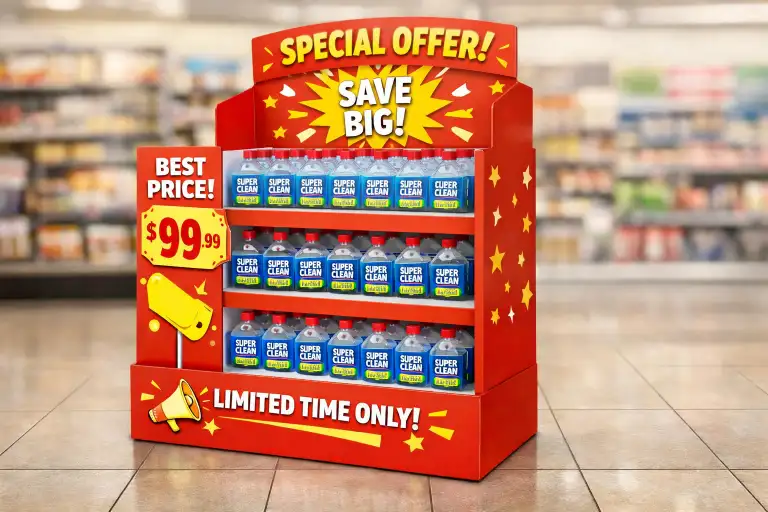
- POS (Point of Sale2): This is specifically for displays at the checkout counter where the transaction occurs. Small countertop units holding gum or batteries are classic examples.
- Corrugated Display: This is a technical name based on the material. Most of these displays are made from corrugated paperboard, which has a fluted layer between flat liners for strength, not simple cardboard.
Here is a simple table to help you remember the different names.
| Term | What It Means | Common Example |
|---|---|---|
| POP Display | Placed where customers decide to buy | Aisle Floor Display |
| POS Display | Placed at the checkout counter | Countertop Unit for candy |
| Corrugated Display | Describes the strong material used | Any display made of fluted board |
| Dump Bin | A large bin for loosely piled items | Discounted seasonal products |
| Pallet Display | Ships on a pallet, displayed as a unit | Bulk items at a warehouse club |
What is the price of a cardboard display stand3?
Are you worried about how much a custom display4 will cost? Prices can seem unpredictable and can quickly eat into your marketing budget. I’ll explain what factors determine the final price.
A cardboard display stand3 can cost anywhere from $15 to over $150 per unit. The final price depends heavily on the design complexity5, order quantity, material grade6, and printing finishes7. Larger orders significantly lower the cost per unit.

Budgeting is always a top concern for my clients. The most common question I get is, "How much will this cost?" There isn't one simple answer, but I can break down the elements that influence the price. The goal is to find the right balance between creating an amazing display and staying within your budget. The key is understanding where the costs come from so you can make informed decisions.
Key Cost Drivers
Several factors directly impact the cost of your display. By adjusting these, you can control the final price.
- Structure & Size: A simple, small counter display will cost much less than a large, multi-tiered floor display with complex shapes. More material and more complex engineering increase the cost.
- Material Grade: The strength of the corrugated board matters. A display holding heavy items like bottles needs a stronger, more expensive board than one holding light items like chip bags.
- Printing & Finishes: Full-color (CMYK) printing on all surfaces costs more than one-color printing. Special finishes like glossy or matte lamination also add to the price but can really make your display pop.
The Impact of Quantity on Price
This is the most important factor for budget. The setup costs for a production run (like making the cutting die and printing plates) are the same whether you order 100 or 1,000 units.
| Quantity | Setup Cost (Example) | Per-Unit Setup Cost | Production Cost (per unit) | Total Cost Per Unit |
|---|---|---|---|---|
| 100 units | $1000 | $10 | $20 | $30 |
| 500 units | $1000 | $2 | $18 | $20 |
| 1000 units | $1000 | $1 | $16 | $17 |
As you can see, ordering more units dramatically reduces the per-unit price. This is why planning for a larger campaign can be much more cost-effective.
What are cardboard display boxes8?
Do you need a solution that is both a package and a display? Shipping products to stores and then having them set up on shelves can be a time-consuming hassle for retailers.
Cardboard display boxes8, often called Shelf-Ready Packaging9 (SRP) or PDQ boxes10, are dual-purpose solutions. They act as a shipping container and then convert easily into a retail display that can be placed directly on the shelf, saving valuable time for store staff.
")
I've worked with many brands targeting major retailers like Walmart, and these stores love Shelf-Ready Packaging9. They call it "PDQ," which stands for "Pretty Darn Quick," because it makes stocking shelves so efficient. Instead of a clerk unboxing 24 individual items, they just tear off a perforated top from the shipping box, and the product is instantly on display, perfectly arranged.
The "Pretty Darn Quick" Advantage
The main benefit of SRP is speed and efficiency for the retailer. This makes them more likely to give your product good placement.
- Reduced Labor: Staff spend seconds, not minutes, stocking your product.
- Less Waste: It minimizes packaging waste at the store level.
- Perfect Presentation: It ensures your products are always displayed as you intended, with your branding front and center.
Designing Effective Display Boxes
Creating a successful SRP box requires careful engineering. It must be strong enough to survive shipping but easy enough for a store employee to open without a knife or any struggle. The perforations have to be just right—strong enough to hold together during transit but weak enough to tear away cleanly. The graphics also need to do double duty. The outer case needs shipping information, while the inner display needs to feature your marketing message. Getting this balance right is something my team has perfected over the years. This dual functionality is what makes SRP such a powerful tool for brands.
How to make a cardboard display stand3?
Are you curious about how a display goes from a simple idea to a finished product in a store? Understanding the process can feel complex, but it's a straightforward journey when you have the right partner.
Making a cardboard display involves key steps: structural design11 and prototyping, printing the graphics, die-cutting12 the shapes from corrugated sheets, and finally, finishing and assembly13. Every step requires precision to ensure the final display is strong, stable, and looks great.

I love bringing a client's vision to life. The process is a blend of creativity and technical manufacturing. It all starts with a conversation and ends with a display that helps sell your product. Let me walk you through the typical steps we take to create a custom display4 from scratch. Seeing how it's done helps you appreciate the detail and planning involved.
Step 1: Design and Prototyping
Everything begins with your idea. You tell us what you need—the product it will hold, the stores it will go in, and your brand's look.
- Structural Design: Our engineers use special CAD software to create a 3D structural design11. We figure out the best way to hold your product securely while looking great.
- Dieline Creation: We then create a flat technical drawing, called a dieline, which is the blueprint for the display.
- White Sample: Before printing anything, we create a full-size, unprinted "white sample14." You can use this to test your products, check the size, and ensure the structure is exactly what you need. This step is crucial and prevents costly mistakes.
Step 2: Printing and Die-Cutting
Once you approve the sample, we move to production.
- Printing: Your graphic designer places your artwork onto our dieline template. We then print the art directly onto large sheets of corrugated board using high-quality offset printing presses.
- Die-Cutting: We create a custom cutting tool, or "die," which is like a giant cookie cutter. This die is used to stamp out all the individual pieces of the display from the printed sheets with perfect precision.
Step 3: Finishing and Assembly
The final stage is putting it all together. The flat, cut pieces might get a protective coating, like lamination, to prevent scuffs and moisture damage. Then, our team expertly glues, folds, and assembles the necessary parts. Most displays are packed flat with a simple assembly instruction sheet to save on shipping costs. We design them to be so easy to put together that anyone can do it in minutes right in the store.
Conclusion
Now you know the types, names, costs, and creation process for custom cardboard displays. This knowledge will help you choose the perfect solution to make your products stand out and sell.
-
Understanding Point of Purchase can enhance your marketing strategies and improve customer engagement. ↩
-
Learn about Point of Sale displays to optimize your checkout area and boost impulse purchases. ↩
-
Explore options for cardboard display stands to effectively showcase your products. ↩ ↩ ↩
-
Understanding custom display costs can help you budget effectively for your marketing needs. ↩ ↩
-
Learn how design complexity impacts pricing to make informed decisions for your displays. ↩
-
Understanding material grade can help you choose the right strength for your display needs. ↩
-
Explore various printing finishes to enhance the visual appeal of your displays. ↩
-
Get insights on designing display boxes that attract customers and enhance branding. ↩ ↩
-
Discover how Shelf-Ready Packaging can streamline your retail operations and save time. ↩ ↩
-
Learn about PDQ boxes and how they can improve product placement and efficiency. ↩
-
Understanding structural design is crucial for creating effective and durable displays. ↩ ↩
-
Explore die-cutting techniques to achieve precision in your display production. ↩
-
Learn about finishing and assembly to ensure your displays are ready for retail. ↩
-
Discover the importance of white samples in testing and finalizing your display designs. ↩